Lime & Coconut Chicken


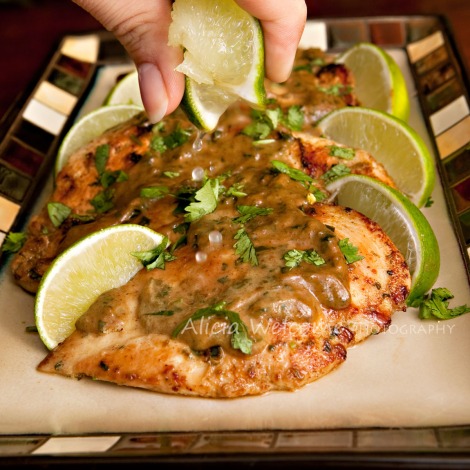
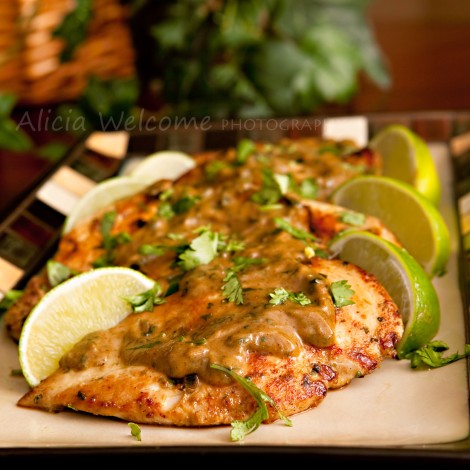
As if you couldn’t tell it would be great just by the name….. seriously!  Lime and coconut are two of the best things you can put on food!  We definitely enjoyed this, and I can see myself making it often for sure.  There is so much flavor packed into this chicken.  You get the somewhat spicy quality of the curry, cumin, serrano, and cayenne.  And then you get the sweetness from the sugar and soy sauce, which is offset nicely by the sour lime and freshness of the cilantro.  Of course the coconut gives you that lush, thick and creamy sauce that I could seriously just eat with a spoon it’s that good.

And if the flavor alone wasn’t enough to convince you to try this chicken, maybe I can entice you further by telling you how easy it is to make!  You mix your marinade, throw the chicken in, forget about it for just 2 hours (that’s seriously all it takes), pull the chicken out and fry it up in a skillet or grill it if you prefer, dump the marinade in a saucepan and boil it, top it with some fresh cilantro and lime and you’re done!  It pairs very well with copycat Cilantro Lime Rice from Chipotle which I haven’t photographed today, but I will include a link to the recipe below.

I will take this one step further for those following along with my recent foray into a new diet, and say this is definitely Low FODMAP diet worthy!  If this is the first you have heard me speak of it, here is a link that explains the diet.

So whether you make this because you trust me about the taste, are excited about the ease of preparing the recipe, or you are searching for Low FODMAP foods… or maybe you just think the pictures make it look irresistible… you will not be sorry!  My one suggestion would be that if you are watching calories, or sugar intake you could definitely get away with maybe half the sugar.  It’s a bit sweet, but not overly so.  For my personal tastes I will try it that way next time as I am not a big sweet person when it comes to things like meat.

Cilantro Lime Rice


Lime & Coconut Chicken

Serves : 4

Ingredients :

  • 2 lbs boneless, skinless chicken breasts
  • 3 T. oil
  • zest of 1 lime
  • 1 tsp. ground cumin
  • 1 1/2 tsp. ground coriander
  • 2 T. soy sauce
  • 1 1/2 tsp. kosher salt
  • 2 T. sugar
  • 2 T. curry powder
  • 1/2 cup coconut milk
  • pinch cayenne
  • 1 small fresh hot chili, such as Thai or Serrano, minced
  • 1/4 cup chopped fresh cilantro
  • fresh limes, cut into wedges

Directions :

  1. Trim fat from chicken breasts. Starting on thick side of the breasts slice the chicken breasts almost in half, then open each like a book.  Place each open breast between two pieces of plastic wrap, wax paper or inside a large, open, Ziploc bag.  Using a small heavy pan, bottle or smooth meat mallet lightly pound out each breast into even thickness.
  2. Mix all remaining ingredients except fresh cilantro and limes.
  3. Add chicken and marinade to a large bowl or ziploc bag and chill in the refrigerator for up to two hours.
  4. Once you are ready to cook the chicken, remove each breast from the marinade.  Pour the marinade into a small saucepan and bring to a rolling boil. Boil continuously for at least 2 minutes, stirring occasionally so it doesn’t burn.
  5. In a heavy skillet or grill pan, heat a splash of oil over high heat.  Cook the chicken in batches to prevent over crowding the pan.  Place the breasts in the hot pan and cook without turning for a couple minutes.  Flip the breasts over and cook until the other side is golden, it shouldn’t take long depending on the thickness of your chicken.
  6. Place cooked breasts on a plate in a warm oven or under foil while cooking the remaining chicken.  Sprinkle with fresh lime juice and cilantro. Serve with sauce on the side.

Recipe from Pinned by dani
_MG_6982-1 copy
_MG_7002-2merge

Published in: on July 21, 2013 at 1:46 pm  Leave a Comment  
Tags: , , , , ,

Mediterranean Pasta


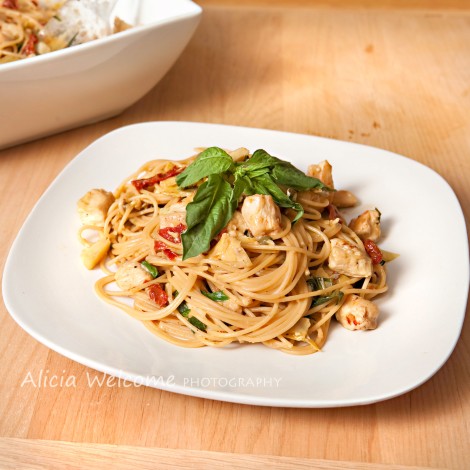
This was another fantastic dish.  Judging by the ingredients I didn’t expect it to be as flavorful as it was.  While I am all for eating healthier, I will admit that at times I find the food to be a bit on the bland side.  There wasn’t much in this recipe that made me think it would be otherwise, and especially in regards to the sauce.  But somehow, when you put these simple things together, magic happens and as I said, there is an abundance of great flavor.  There is a nice not of heat from the chili flakes, plenty of freshness from the lemon and basil, and a great Mediterranean flavor blend from the garlic, artichokes, capers, and sundried tomatoes.  It’s just another added bonus that this dish is so healthy for you!

For the pasta, I suggest using something like Barilla Plus.  It has the health benefits of other whole wheat pastas, but resembles white pasta more closely in texture and appearance which makes it a bit more enjoyable.  I used regular spaghetti because it’s the size I had on hand, although the recipe calls for thin.  I really don’t think it matters.  For the artichokes I used marinated hearts from a jar, and I used sundried tomatoes packed in oil to save time.  I just squeeze as much oil off them as I can before cutting them up.

As you can see from the picture, this is also a beautiful dish with all the colors.  As you know, I am a firm believer in the enjoyment of foods based on not only how they taste, but also how they look!  This one was so good, and so simple I think I will be making it again soon!


Mediterranean Pasta

Makes : 4 servings

Ingredients :

  • 1/3 cup sundried tomatoes
  • 1 cup reduced sodium chicken stock
  • 1 T. lemon juice
  • 2 tsp. lemon zest
  • 2 tsp. flour
  • 8 oz. multigrain thin spaghetti
  • 1 lb boneless, skinless chicken breast, cut into bite size pieces
  • salt and pepper
  • 3 tsp. olive oil, divided
  • 3 cloves garlic, minced
  • 1/4-1/2 tsp. red chili flakes (I think I used about 1/3 tsp.)
  • 1 (9oz) pkg. frozen artichoke hearts, thawed (or canned)
  • 2 T. capers
  • 1/2 cup fresh basil
  • 2 T. grated parmesan cheese

Directions :

  1. Place the sundried tomatoes in a small bowl and soak them in warm water to soften them.  If using tomatoes packed in oil, you can skip this step. 
  2. To make the sauce, stir the chicken stock, lemon juice, zest and flour together in a bowl.  Set aside. 
  3. Bring a large pot of salted water to a boil and add the spaghetti.  Cook according to package directions, until al dente.  Drain and reserve about ½ cup of the pasta water. 
  4. Season the chicken with salt and pepper.  Heat 2 teaspoons oil in a large sauté pan or skillet over medium high heat.  Add the chicken and cook without moving it until it is browned on one side, about 3 minutes.  Turn the chicken over and cook on the other side until browned.  Remove the chicken and set aside in a bowl.
  5. Turn the heat down to medium and add the remaining teaspoon oil.  Add the garlic and chili flakes and cook until fragrant, about 30 seconds.  Stir the sauce mixture and pour it into the pan.  Stir to pick up any browned bits from the bottom of the pan.  Drain the sundried tomatoes and slice them.  Add them to the pan along with the artichokes, capers and chicken.  Simmer for a few minutes to allow the ingredients to heat up and the flavors to meld.  Add the pasta along with the basil and cheese.  Toss to combine all ingredients well.  Add some of the reserved pasta water as needed until the sauce reaches the desired consistency.  Garnish with fresh basil and serve.

Recipe from The Foodie Physician

_MG_6745-1


Chicken Enchiladas in Creamy Avocado Sauce


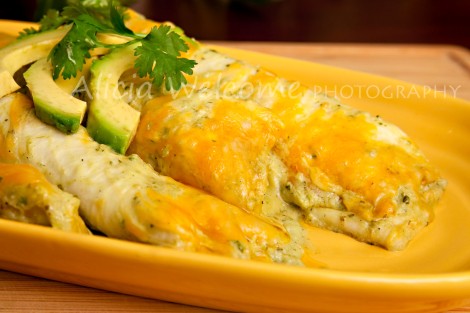
As promised, this is the recipe I was talking about in my last post that I claimed was “Out Of This World”!!!  Enchiladas are good, but these are so much better.  I could have eaten the sauce with a spoon it was that good.  So fresh and vibrant with it’s gorgeous green color.  And the enchilada process was a breeze since it uses rotisserie chicken.  You all know how I feel about rotisserie chicken by now lol.

I had just enough salsa verde left over from the previous recipe (The Corn and Jalapeno Griddle Cakes) and I absolutely loved the flavor of it in this.  I used the World Table brand, and found it at Albertsons, but you can use whatever you have.  The cheese-lover in me was quite pleased by the amount of cheese in this recipe…. which is a lot lol.  It calls for cheddar and Monteray jack, and I used sharp cheddar and a Mexican blend in ours.  It also calls for 8 tortillas but I think I got more like 11 out of it and they were quite full.  I did end up using more like 5 cups of chicken though since I bought two containers of the already shredded rotisserie chicken (LOVE that about Albertson’s) and knew one wouldn’t be enough.  They are also very filling so this recipe could easily feed 5-6 people.

My only regret with this recipe was not taking shots of the enchiladas during the process, and when I poured the lovely green sauce all over them.  I have never been one to have the time or patience to stop and take shots throughout preparing a meal, and honestly my house doesn’t have a lot of good lighting so it wouldn’t turn out very well, but I wish you all could have seen how amazing it looked.  In trying to get a few out of the dish to plate for a picture I ended up losing a lot of the sauce off the tops which is why they look so white in the picture I have.  Trust me they are plenty saucy!


Chicken Enchiladas in Creamy Avocado Sauce

Serves – 5 or 6

Ingredients :

  • 1 C. chicken broth
  • 1 C. salsa verde
  • 1/2 C. sour cream
  • 4 avocados (2 for sauce, 2 for stuffing)
  • 1 clove garlic (I may have used two)
  • 1 tsp. cumin
  • salt and pepper to taste
  • 1 handful cilantro
  • 1/2 lime, juiced (I used the zest of a lime too and my lime was pretty large it reminded me more of a lemon)
  • 1 jalapeno, seeded
  • 4 C. rotisserie chicken, shredded
  • 2 green onions, sliced
  • 2 cups cheddar cheese, shredded (see note above)
  • 2 cups Monteray Jack cheese, shredded (see note above)
  • 8 (7 inch) flour tortillas (see note above)

Directions :

  1. Preheat oven to 350 degrees. Puree the chicken broth, salsa verde, sour cream, 2 avocados, garlic, cumin, salt and pepper, cilantro and lime juice in a blender or food processor until smooth.
  2. Mix the half of the sauce with the chicken, 1 chopped avocado, green onions and half of the cheese.
    Coat the bottom of a large baking dish with some of the sauce, wrap the chicken and avocado mixture in the tortillas and place them in the dish.
    Top the enchiladas with the remaining sauce.
  3. Bake for 20 minutes or until sides are bubbly.  Top with cheese and bake an addition 5-10 minutes.  Use remaining avocado for garnish.

Recipe from Laughing Spatula

_MG_6216-1 copy


Buffalo Chicken Salad with Greek Yogurt


You may or may not realize by now that I love buffalo chicken!  I have shared many recipes already featuring it, and will likely continue to search for others to share.  I haven’t tried many chicken salads in my day, but I think this is my favorite one!  A lot of chicken salad recipes will call for you to boil the chicken, which is fine, but for some reason the idea just doesn’t sit well with me or my husband.  When I come across a recipe that suggests boiling raw chicken I usually just pre-cook my chicken, or in this case (and it’s actually what the recipe called for) I love to use rotisserie chicken.  It’s always good, very versatile, and cuts back on the hassle of making my own.  It’s also the only way Jeff gets to enjoy a little dark meat since I generally only buy chicken breast meat.

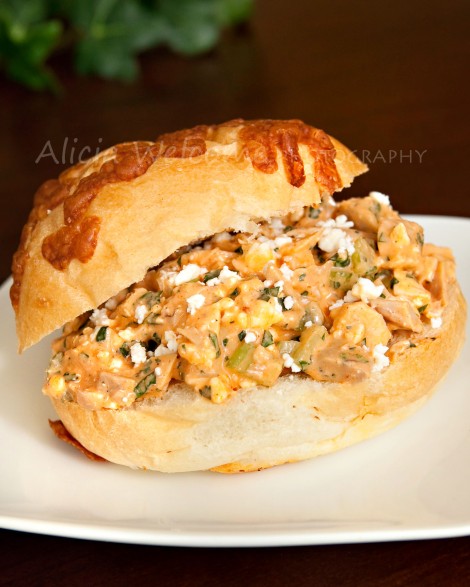
Anyway, this chicken salad is the perfect mix of buffalo flavor, crunch from the celery, and creaminess from the yogurt, and freshness from the herbs.  I wasn’t sure about using greek yogurt at first, but it has that little bit of a tang that really goes well with this, and it’s much healthier than using something like ranch dressing.  I also have a bit of an aversion to blue cheese so I substituted out feta instead which worked well.  I did end up using about 3 stalks of celery because I wasn’t sure if my chicken produced quite 4 cups of meat and I didn’t want it to be too saucy, but I think with an ingredient like that it’s really fine to just use however much you want.  I actually don’t like celery on it’s own, but even I can’t deny it goes so well with buffalo sauce.  I served this on some asiago cheese rolls and it was simply fantastic, and it makes a good amount so I had it for lunch for days afterwards too.


Buffalo Chicken Salad with Greek Yogurt

Serves : I think I got about 7-8 sandwiches out of it

Ingredients :

  • 1/2 cup non-fat plain greek yogurt (I used chiobani)
  • 1/2 cup Franks Red Hot Wings Buffalo sauce
  • 1 tsp. salt
  • 1/2 tsp. garlic powder
  • 1/2 tsp. fresh ground black pepper
  • 4 cups of cubed, cooked chicken (about 1 rotisserie chicken)
  • 2 celery stalks, chopped
  • 1/2 cup cilantro, minced
  • 1/2 cup crumbled blue cheese
  • rolls or wraps for serving

Directions :

  1. Combine the first 5 ingredients in a large bowl and give them a whisk.  Then fold in the chicken, celery, cilantro, and blue cheese.  Serve on rolls, in wraps, or however you like.

Recipe from The Novice Chef

_MG_6011-1

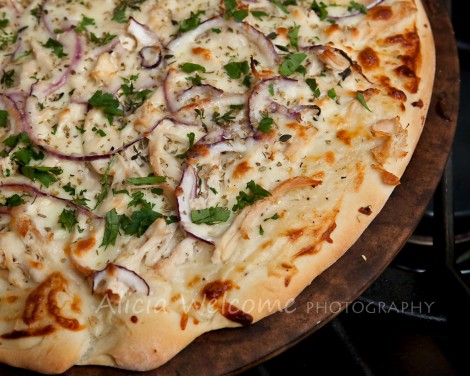
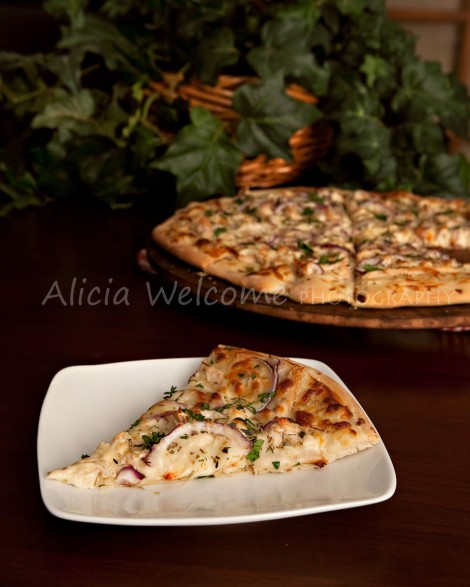
Roasted Garlic Chicken & Herb White Pizza


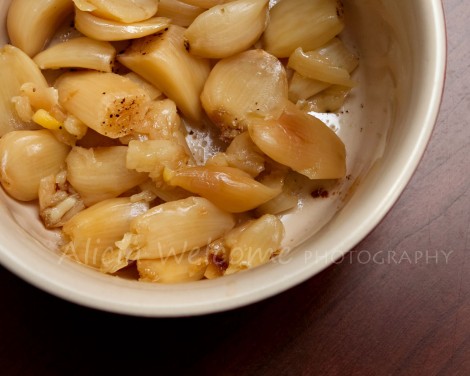
There is nothing better than the smell of roasting garlic!  Well maybe coffee, but as far as savory goes garlic is where it’s at!  It’s so simple to do, and roasted garlic makes so many dishes better.  I like it slathered on bread with butter and toasted, in sauces, or even as whole cloves in/on a dish.  There is a pizza from The Rock Wood Fired Pizza & Spirits called Satisfaction that uses whole roasted garlic cloves on top and I just LOVE it!  If you haven’t tried that one, do so next time you are there.

Ok, now to tonight’s pizza.  It was good, but both my husband and I kind of felt like it was lacking in flavor.  I wanted to stay true to the recipe and give it a shot, but I think if I made it again I would go with my gut and throw some whole cloves on it as well.  I also think something like some olives, or maybe kalamata olives would go a long way to kick up the flavor a bit.  I also think I would throw a little Provolone or maybe Asiago on it as well to just give it more complexity of flavor.  It is a good starting point though for sure.

For the pizza dough you could certainly use store bought, either already prepared or in dough form.  If you have the time though (and you could even make this ahead of time, freeze it, and pull it out the morning you want to use it) I strongly suggest making your own, and more specifically Emeril’s recipe which I shared here for the Stromboli recipe.  Seriously great dough, and awesome to work with.

Roasted Garlic Chicken & Herb White Pizza

Ingredients :

  • 1 lb pizza dough
  • 8 cloves roasted garlic, minced (make ahead)
  • 2 T. butter
  • 2 T. flour
  • 1/2 cup skim milk
  • 1/4 cup half and half
  • 1/2 tsp. black pepper
  • 1/4 cup fresh grated Parmesan cheese
  • 1 1/2 cups cooked chicken, shredded (I used rotisserie)
  • 1/4 cup red onion, diced
  • 3/4 cups Mozzarella cheese
  • 1 tsp. fresh thyme, chopped
  • 1/2 tsp. dried oregano
  • 1 T. fresh parsley, chopped

Directions :

  1. Preheat oven to 450 degrees. Prepare a baking sheet with a siplat liner, or grease and sprinkle with cornmeal.  (I use a pizza stone, and with the dough recipe I shared I have found no need for corn meal on the bottom).
  2. Melt butter in a small saucepan. Saute roasted garlic for 1 minute.
  3. Add flour, and mix until well blended. Cook for 1 minute.
  4. Slowly whisk in the milk and half and half. Mix in the pepper.
  5. Cook for about 3 minutes, or until it starts to thicken. Remove from heat, and stir in Parmesan cheese.
  6. Spread dough into roughly a 12 inch circle on prepared baking sheet. Spread white cause over the dough. Top with chicken, red onions and cheese.
  7. Bake for 17 minutes, or until the crust is golden, and the cheese is melted.
  8. Remove from the oven, sprinkle with herbs. Cut and serve immediately.

Recipe from Dinners Dishes & Desserts

_MG_5841-1
_MG_5854-1

_MG_5861-1

Chinese Orange Chicken


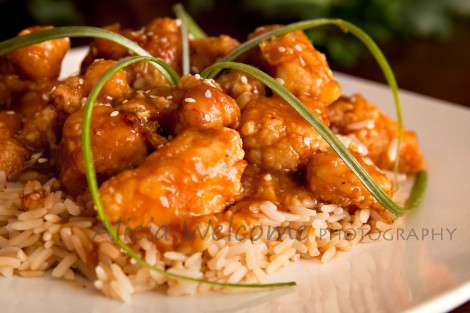
I love making my own Chinese food at home.  The first one I ever tried to make was sesame chicken, and I was hooked.  Though there is often a bit of prep work involved, the actual cooking process/time is quite simple and, in my opinion, homemade Chinese food is often WAY better than what you can get at most Chinese restaurants.  At least this is true when you live in remote northern Idaho…. which I did at the time.  Now that I am near Portland I am sure there are many great places to choose from, but you just can’t beat the simplicity of making it at home.  Because you are making it at home you can control things like the salt content, or portion sizes, which let’s face it are HUGE at most restaurants.  So you can have Chinese any day of the week and not feel guilty for the amount of oil and salt you just consumed.

I have had Orange Chicken numerous times over the years, and it’s always different wherever you go.  Years later I still remember the delicious chicken balls with orange sauce we had while staying in Toronto.  That is my idea of orange chicken…. but on the occasion when I am really in a hurry I’ll pick some up from somewhere like Panda Express and I am always left disappointed by their idea of orange chicken.  For starters it’s nothing like the image they have up, and comes out looking more like general tso than anything orange infused.  Then there is NO orange flavor whatsoever.  I honestly don’t know why they call it orange chicken.  It’s not terrible food, but it’s not orange chicken either.

This, however, does have a lot of orange flavor.  There is a great complexity from all the sauce ingredients, with a bit of heat, sweetness, salty, and citrus.  Though time consuming, making your own fried chicken results in a much tastier, less greasy, end result.  I liked that the chicken was so freshly tossed with the sauce that it retained a lot of the crunch from the breading and the amount of sauce left over was the perfect amount to mix in with the rice.  I made two packets of boil-in-a-bag brown rice which left us with a little more than we needed, but one would have been not enough.  When frying the chicken I used vegetable shortening (the Crisco one in a can) which was something I had never done before but wanted to try.  It worked really well and from what I hear gives it a better flavor.  I don’t have a thermometer that monitors temperatures that high, so I just kept a close eye on things to make sure it wasn’t too hot.  I suggest using a thermometer if you can though.  You don’t want to have your oil too low and end up with oily chicken, or too high and end up with burned outsides and raw insides or a house full of smoke or a fire lol.  I also used my dutch oven to fry in because I like having the taller sides to avoid the mess.

I admit my kitchen was in a state of utter disaster after dinner last night, but it was definitely worth it!


Chinese Orange Chicken

serves : 4

Ingredients :

  • 1 1/2 lb boneless skinless chicken breast, cut into bite sized pieces
  • 1 cup low sodium chicken broth
  • 1/2 cup fresh squeezed orange juice
  • 1 T. orange zest
  • 1/3 cup white vinegar
  • 1/4 cup soy sauce
  • 2 garlic cloves, minced
  • 1/4 tsp. dried ginger (I used a bit of fresh ginger paste)
  • 2/3 cup granulated sugar
  • 1 tsp. sriracha hot sauce
  • 2 T. grated yellow onion
  • fresh ground pepper to taste
  • 1 1/4 cups + 2 T. cornstarch, divided
  • 2 T. cold water
  • 2 large eggs
  • vegetable or peanut oil for frying
  • green onions and sesame seeds for garnish

Directions :

  1. Place chicken pieces in a gallon size resealable bag, set aside. In a medium saucepan combine chicken broth, orange zest, orange juice, vinegar, soy sauce, granulated sugar, ginger, yellow onion, garlic, Sriracha and pepper. Whisk mixture well, then measure out 2/3 cup of the mixture and pour it over the chicken in resealable bag. Seal bag while pressing excess air out, and press chicken into marinade. Place bag in a bowl or baking dish and refrigerate 30 minutes. Meanwhile, return remaining sauce mixture over medium heat and bring mixture just to a boil, stirring frequently. In a small bowl whisk together 2 Tbsp cornstarch with 2 Tbsp water then stir mixture into sauce. Reduce heat to medium-low and cook 1 – 2 minutes longer, stirring constantly, until thickened, remove from heat.
  2. Pour vegetable oil into a large cast iron dutch oven, filling pot about 1 1/2 – 2-inches deep and heat oil to 350 degrees. Meanwhile, whisk eggs in a shallow dish until well blended. Pour remaining 1 1/4 cups cornstarch into a separate shallow dish. Remove chicken from refrigerator and drain and discard marinade from chicken.
  3. Dip chicken pieces into egg followed by cornstarch and toss pieces to evenly coat in cornstarch, then carefully place 1/3 of the chicken pieces into preheated oil and cook for 5 – 7 minutes until golden, turning once during cooking. Using skimmer, remove fried chicken from oil and transfer to a paper towel lined cookie sheet to drain excess oil. Repeat process with remaining chicken working in two more batches.
  4. Pour drained fried chicken into a bowl and toss with sauce. Serve warm over white or brown rice garnished with green onions and sesame seeds if desired.

Recipe from Cooking Classy

_MG_5817-1

Published in: on March 11, 2013 at 6:54 pm  Leave a Comment  
Tags: , , , , , ,

Orzo Chicken Asiago


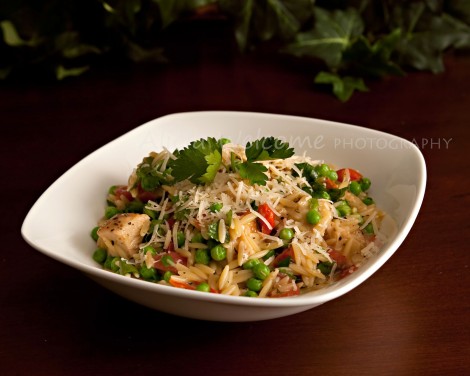
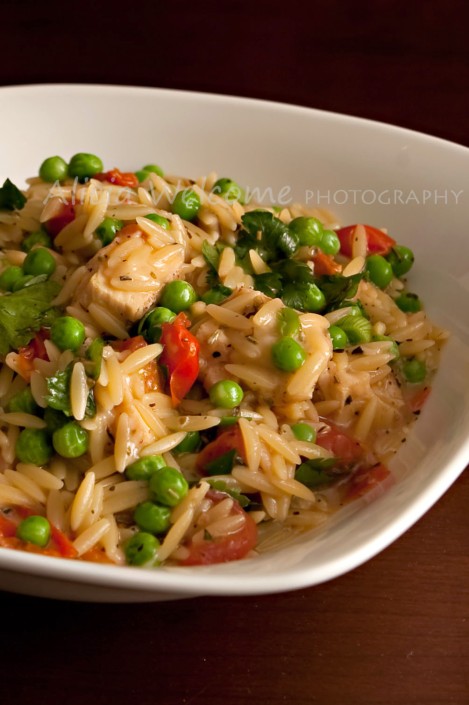
There are times when the simplest of recipes to prepare end up being some of the best to eat, and this is one of those times.  I could see this becoming a regular in anybody’s household.  It’s far within most people’s comfort zones, simple to make, and has everything most people look for in a meal.  You have your starch, your protein, your dairy, and your veggies all in one colorful dish!

While trying to get my husband’s opinion on the dish for this blog, as I often try to do because I feel like he is a “meat and potatoes” kind of guy and therefore harder to please when it comes to trying new things, I was given a rating of 8 out of 10.  When I asked him to elaborate on that, he simply said “the tomatoes weren’t terrible”.  Not exactly helpful if you ask me… I mentioned such to him and that my readers are not going to want to try a dish that is described as being “not terrible”.  He said that if someone like himself, who hates tomatoes, would say the dish was an 8 and that he liked it in spite of the tomatoes that it must be good.  So there you have it… the tomatoes aren’t terrible.

I, on the other hand, and I might add I also don’t like large pieces of tomato, thought they were not only “not terrible” but that they were a key ingredient in the dish, and part of what makes it so fantastic.  All the freshness added by the tomatoes, onions, peas, and parsley give this a light feeling not typical of most pasta dishes. This is also true because of the orzo, which is a small pasta, but seems a lot like rice in shape and texture.  The orzo is perfect for this because it gives it a risotto feel and leave it so creamy in texture with the Asiago.  The only change I made to this recipe was to pre-cook my chicken.  I did this mostly because it had been in my fridge for a few too many days and I was nervous to leave it in there a couple more until I was ready to cook it.  As often happens, I took my meat out with specific dates in mind, but plans changed, and things got pushed back a couple days.  Rather than waste the meat I just cooked the chicken with a little salt and pepper in the skillet and put it back in the fridge.  I have to admit I was a little apprehensive about boiling the chicken for so little time in this recipe (and especially now because my orzo only took 9 minutes to cook) from a raw state, and it being done properly.  So even when I make this next… and there will be a next time…. I will pre-cook the chicken as I did this time.  For the wine I again used the Moscato I had opened the night before and it worked very well for this….. and was also quite enjoyed straight from the bottle as I was cooking… shhh!  Good thing I was only cooking for my husband and I lol.

Anyway, I highly recommend EVERYONE try this recipe.


Orzo Chicken Asiago

Serves : 4

Ingredients :

  • 1 lb chicken breast, cut into bite sized pieces (see above, I pre-cooked mine)
  • 1 1/4 cups uncooked Orzo
  • 3 cups chicken broth
  • 1/4 cup white wine
  • 1/2 tsp. sea salt
  • 1 tsp. basil
  • 1/2 tsp. oregano
  • 1 tsp. rosemary
  • 1/4 tsp. black pepper
  • 1/4 cup green onions, chopped
  • 1 cup fresh diced tomatoes (I used cherry tomatoes)
  • 1 cup frozen peas
  • 1 cup fresh grated Asiago cheese
  • parsley

Directions :

  1. Do your prep work ahead of time so you can keep your attention on the pasta, and stirring it.  You also don’t want to over cook your pasta into mush!
  2. In a dutch oven combine broth and white wine.  Bring to a boil over medium-high heat.  Add the chicken and orzo.  Reduce to a simmer and cook for about 9-12 minutes or until pasta is done, but still a bit al dente.  Mine took about 9 minutes.  Stir frequently the entire time.  About halfway through cook time add your dry herbs, salt and pepper.
  3. In the last minute add the tomatoes and green onions. 
  4. Remove from heat, add in the frozen peas and stir around to help cook the pasta.  Add in your cheese and parsley and serve.

Recipe from citronlimette

_MG_5798-1
_MG_5792-1

Published in: on March 9, 2013 at 9:19 am  Comments (1)  
Tags: , , , , , , , , , ,

Chicken Nacho Soup


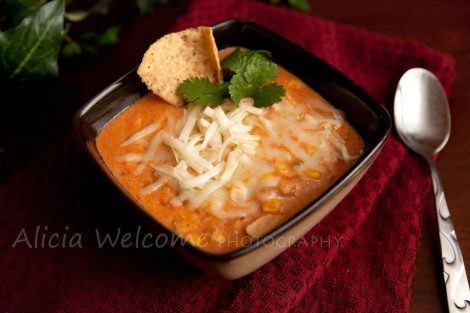
I may have mentioned before that I am not much of a soup person, but that doesn’t stop me from trying them from time to time.  In doing so, I have actually found a couple I really like, which is a pretty big change from hating all soups.  Tonight’s soup was pretty good, but I am not sure it will become a favorite for me personally.  I think I would have liked it to be a tad creamier somehow, or a little less hot sauce since that was the dominating flavor to me.  I did like it with the chips for dipping though, and as far as soups go I would probably eat it again just to keep things different once in a while… perhaps with the changes I mentioned.  Jeff eats soup a lot more often than me and he said it was good, so perhaps he’s a better judge for this one.

It comes together quite easily, and doesn’t need a lot of time to cook which is always a good thing on those busy weeknights.  I love that it uses rotisserie chicken because that’s even less work you have to do, and I just really like rotisserie chicken.  At first I wasn’t sure what the recipe meant by “nachos”, but I decided it must have meant tortilla chips since the article also mentioned dipping them in the soup and some were pictured with it.  So anyway, I went with an Artisan Toasted Southwestern variety and they were perfect for this.  For the cheese I used Monteray Jack, but I bet cheddar, mozzarella, or even pepper jack if you really like the heat would also be good.

Chicken Nacho Soup

Serves : 4-6             Time to make : 40 minutes

Ingredients :

  • 1/2 rotisserie chicken, shredded
  • 1 medium onion, chopped
  • 5 cloves garlic, minced
  • 1 jalapeno, diced
  • 3 T. olive oil
  • 1/2 (8 oz) package cream cheese (I used fat free)
  • 1/2 cup water
  • 1 cup salsa
  • 1 can corn, drained
  • 4 C. chicken broth
  • 1 T. hot sauce
  • 3 T. tomato paste
  • 1 C. nachos, crumbled
  • salt and pepper to taste
  • shredded cheese for topping
  • cilantro or parsley for topping (optional)

Directions :

  1. Heat oil in a large soup pot or dutch oven over medium heat.  Cook onions in hot oil until translucent.  Add garlic and jalapenos and cook a minute more.
  2. Add water and cream cheese, stirring until cheese is melted.  Add crumbled nachos next, this helps to thicken the soup.  Add chicken, corn, and salsa and stir to combine.  Then add your broth, hot sauce, and tomato paste and stir again.  Salt and pepper to taste.  Bring to a low boil and simmer for about 20 minutes.
  3. Serve with shredded cheese, cilantro, and more nachos for dipping.

Recipe from Jo Cooks

chickennachosoup

Sticky Glazed Chicken & Couscous


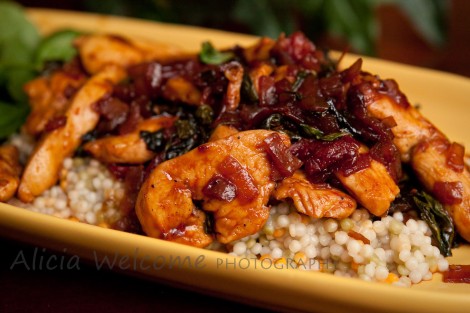
Another aptly named dish!  This is one of those recipes where it would be very helpful to have everything measured out and ready ahead of time since towards the end things come together rather quickly, and if you want to time everything to be done together you may end up flustered at the end as you try to get your couscous going, keep an eye on the chicken and onions  (which were getting very close to being overdone in my case), and measure out the sauce ingredients.  Especially if you are like me and seem to always end up in a rush to get something like your brown sugar, only to find you are at the end of the bag and it’s pretty clumpy so you have to take extra care to break it up first.  And the slow pour of things like vinegar can be agonizingly worse when you are in a hurry.  So I like to just have things measured out into little dishes sitting next to me for convenience.  Back to original point… because I did NOT have it all ready I was a bit flustered as mentioned and in trying to get it all together and plated I found out just how sticky it was when my hands became a serving utensil…

Anyway, this is a very tasty recipe for sure, and a very attractive looking dish as well.  The recipe I followed called for regular couscous, but Jeff is not a fan and I had been wanting to try the larger pearl variety so figured this would be a good time.  This of course added to my flustered state since I didn’t realize it was cooked slightly different from regular couscous which you just boil the liquid for, dump it in, cover it and leave it.  For the pearl couscous (I used a tricolor variety) you actually have to cook it on low for a little longer and stir it occasionally, so just be aware of that before you start.  I definitely prefer the large variety now that we’ve tried it and think I will use that whenever I can, especially since Jeff seems to agree.  If you are not familiar with couscous you may be concerned that the amount of food seems small for two people, but like rice it fills you up pretty quickly because it expands.  If you do decide to go with the larger variety though you could get away with making a cup rather than 2/3 as stated in the recipe.

Jeff said this reminded him a lot of sweet and sour which is no surprise given the vinegar and sugar based sauce, but it’s a little different with the sundried tomatoes and red wine vinegar.  It is nice and sweet and it coats the chicken wonderfully so you get all the flavors in each bite.  I did notice afterwards that I misread a portion of the recipe off my phone and used 4 T. of sugar instead of tsp. which could have made a substantial amount of difference, so I am just going to go ahead and list it as I made it since I had great results.  I encourage you to add  a good handful of spinach or even two since it cooks down so small.  Another great thing about this recipe… at least for me, is that other than the spinach, all the ingredients are things I typically have on hand so I can easily throw this together any time.


Sticky Glazed Chicken & Couscous

Serves : 2                  Time to make : 20 minutes

Ingredients :

  • 3 boneless skinless chicken breasts, sliced thin (about 12 oz)
  • 2/3 cup dry couscous
  • 1/2 small red onion, diced
  • 8 or so sundried tomatoes, chopped (about 1/4 cup)
  • handful of spinach
  • 6 T. red wine vinegar
  • 4 T. brown sugar
  • cooking spray or olive oil

Directions :

  1. Spray skillet with cooking spray or put a bit of olive oil and heat over medium-high heat.
  2. Add onion, cook for 1 min. stirring until slightly browned.  Season and add your chicken, cook about 6-7 minutes until  browned and mostly cooked through.
  3. Boil the water for your couscous  as directed on the package, then add couscous and cover.  If you chose to use the large variety you will need to keep the burner on a lower heat and stir occasionally for about 8-10 minutes (or as directed on package) otherwise it can sit there for about 5 minutes untouched if you used the small kind.
  4. To the chicken, add your vinegar and sugar, and stir it well to get it all mixed.  Throw in tomatoes, and cook a couple of minutes until sauce comes together and gets sticky and thick, and chicken is fully cooked through.
  5. Throw in your big handful of spinach and stir until it just wilts down and remove from heat. Serve chicken over the warm couscous.

stickyglazedchicken&couscous


Pulled Hawaiian Chicken Sandwiches


Tonight’s recipe comes from foodgawker again… yeah I go there a lot lol…. and while I wouldn’t say it was a new favorite it was definitely good.  I think it has potential to be great, but in it’s current form is just a bit simple for my tastes.  However, simple is not always bad, and this is a great way to change things up a bit without getting too adventurous in the kitchen for those that are newer to culinary exploration.  I think the addition of maybe some green peppers would be really good on this, or maybe even some smoky bacon or ham, or jalapenos would help take this recipe to the “great” status.  As I knew he would, Jeff also suggested using a white bun for these, and I agree it would be better, but I was trying to boost the health and cut back on the calories for tonight so went with wheat.  I bet a nice specialty type roll fresh from the bakery would be even better for these; something a bit harder than your basic burger bun.  I also want to point out, that for convenience, I use a counter top grill about 99% of the time and it’s possible that once in a while it sacrifices just a bit of flavor in a dish, but that’s debatable I imagine.  I just think that you get way better char marks on the real thing and that might have pushed this over the “good” status a bit too.

I didn’t have as much fun photographing this dish, but I still think I managed to come up with something drool worthy to share with all of you.

Pulled Hawaiian Chicken Sandwiches

Makes : 5-6 Sandwiches

Ingredients :

  • 1 Lb. boneless skinless chicken breasts
  • 1/2 cup heinz 57 sauce (not ketchup which is a common misconception)
  • 2 T. agave nectar or honey (I used honey)
  • Tabasco
  • Fresh pineapple, cored and sliced into 7 1/2″ rings (I used pre-cut spears and just sliced them thinner)
  • olive oil
  • salt and pepper
  • 5-6 buns or sandwich rolls

Directions :

  1. Heat grill to medium heat.  Place one ring of pineapple in a small food processor and puree until you get a sauce-like result.  Place into a medium bowl and add to that your heniz 57 sauce, agave nectar or honey, and a couple of dashes of Tabasco.  Taste at this point and add some additional honey as desired.  Remove 1/4 cup of the sauce to use for basting and reserve the rest for serving later on.
  2. Brush pineapple rings with a bit of olive oil before placing them on the heated grill.  Cook for 5-7 minutes on both sides until the sugars begin to caramelize and you get nice grill marks.   Pound chicken out slightly to achieve and even thickness before seasoning with salt and pepper and then brushing on half of sauce you pulled earlier to your first side.  If you used a countertop grill like me, you can go ahead and baste the other side once you put it on the hot grill, otherwise you’ll need to remember to baste the other side once you flip your chicken halfway through cook-time.  Cook until chicken is completely done, then set aside and cover with foil to allow the chicken to rest for about 5-10 minutes before shredding with two forks.  (during this time you could toast your buns if you want, which is what I did, but the recipe did not call for it)
  3. Add shredded chicken to the bowl of sauce and toss to coat evenly.  Divide among your buns and top with the rings of grilled pineapple.

pulledhawaiianchickensandwich

Enchilada Pasta Skillet


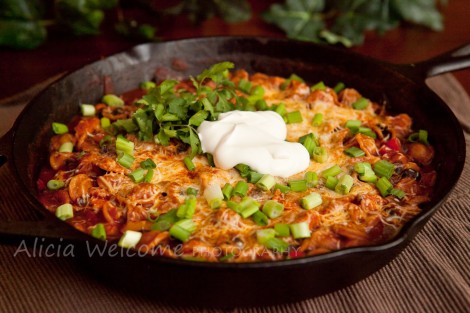
Tonight’s meal is definitely one from the comfort food department.  Like many of the recipes I share on here, this comes together easily and in pretty good time.  It’s been a while since I made actual enchiladas, but this seems much easier without all the filling and rolling and extra dishes.  Everything goes together in one pan for this dish.  Flavor isn’t exactly like a typical enchilada, likely because of the pasta vs. tortillas, but it’s very good nonetheless.

The recipe, which again came off foodgawker (another one of those that caught my attention with a lovely picture), didn’t specify a type of pasta, so I used orecchiette which I had on hand which worked nicely.  They act like little bowls to scoop up the sauce nicely.  I imagine shells would work nicely for this reason too.  Just watch carefully during cook-time for your chosen pasta to reach the al dente stage before moving on to the next step.  I actually used this recipe as an excuse to finally go out and buy a cast iron skillet, which I have been wanting for a long time, because I am too scared to put my Rachel Ray set in the oven.  Make sure you have an oven safe skillet to make this in if you plan to broil the cheese on top at the end.  This makes a large skillet full, so be sure to use the biggest one you have too.

Enchilada Pasta Skillet

Serves : 4                 Time to make : 35-40 minutes

Ingredients :

  • 2 T. olive oil, divided
  • salt and pepper
  • 1 LB chicken, cut into bite sized pieces
  • 1/2 onion, chopped
  • 1/2 red pepper, chopped
  • 1 (14.5 oz) can black beans, rinsed and drained
  • 2 (1o oz) cans enchilada sauce
  • 1 cup chicken broth
  • 1 tsp. Tabasco (Dh said it was a bit much for him so you might want to try half first)
  • 2 oz. Velveeta cheese or shredded cheese (I used a shredded Mexican blend)
  • 8 oz. pasta
  • 1/2 cup shredded cheddar (I used the Mexican blend again)
  • sour cream, cilantro, scallions

Directions :

  1. Heat 1 T. oil in a large skillet over medium heat.  Season chicken with salt and pepper and place in skillet.  Brown on all sides; about 5-7 minutes.  Transfer chicken to a plate and cover loosely with foil.
  2. Wipe out skillet and heat remaining T of oil over medium heat.  Add onions and peppers and cook until tender stirring frequently; about 5 minutes.  Add beans, enchilada sauce, chicken broth, Tabasco, first portion of cheese, and pasta.  Cover and cook at a low simmer until pasta is al dente, stirring occasionally to prevent anything from sticking to the bottom.  Depending on what type of pasta you chose this should take about 10 minutes.   Once you have reached al dente add back in your chicken and continue to cook uncovered until chicken if fully cooked through and sauce thickens; about another 3-5 minutes.
  3. Add remaining cheese to the top and place under broiler for a minute until cheese melts, watching carefully.  Top with a generous dollop of sour cream, chopped scallions, and cilantro either in the skillet or in each individual dish.

enchiladapastaskillet

Cauliflower Crust Thai Chicken Pizza


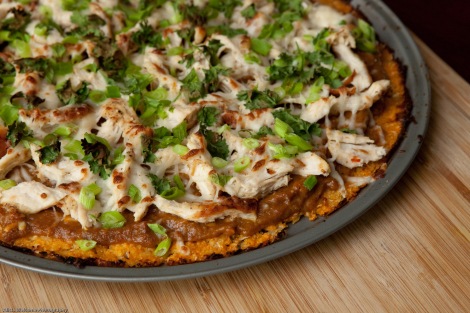
Don’t let the title of this one scare you off… this is an AMAZING pizza.  Not only can you not tell the crust is made from cauliflower, but it’s actually really good.  It might not hold up quite like a regular dough crust, but if I remember correctly (I made this quite some time ago, and just haven’t had time to blog about it) I was able to slice and hold it with some care.  It takes a bit of time, and it might get a little bit messy making this pizza, but it’s definitely worth the effort, and your waistline will thank you too.

Notes: Cauliflower crust doesn’t hold up well for reheating since it’s pretty moist, so plan to eat it all the first night… which is no problem lol.  It won’t smell super appetizing while you heat the cauliflower, but I promise it will taste better than it smells.  When grating the cauliflower use the large holes of a box grater.


Cauliflower Crust Thai Chicken Pizza

makes : 1 pizza

Ingredients :

Crust :

  • 2 cups firmly packed shredded cauliflower (about half to 2/3 of a large head)
  • 1 large egg
  • 1/4 cup finely shredded mozzarella
  • 1 clove garlic, minced
  • 1 T. (or more) Sriracha
  • 1/4 tsp. salt
  • 2 tsp. olive oil

Toppings :

  • 1 (7oz) jar peanut sauce (found in most Asian sections of the grocery store)
  • 2 T. peanut butter
  • 1 cup cooked, shredded chicken (I believe I used rotisserie)
  • 1/2 cup finely shredded mozzarella
  • 4 green onions, green parts only, chopped
  • 2 T. chopped fresh cilantro

Directions :

  1. Preheat oven to 450 degrees F. and spray a large baking sheet or pizza pan (I used a pizza pan with holes covering the bottom for ventilation) with nonstick cooking spray.  Place shredded cauliflower in a large microwave-safe bowl.  Microwave for 8 minutes.  Let cool.
  2. Add egg, mozzarella, garlic, sriracha, and salt to the cauliflower, stirring to combine.  Pat the mixture into a 12-inch round on prepared pan.  Brush with the olive oil.
  3. Bake for 12-15 minutes, or until golden.  Remove crust from oven and adjust oven setting to broil.
  4. In a measuring cup or small bowl stir the peanut sauce with the peanut butter until combined.  Spread sauce over pizza crust.  Arrange chicken over next, then sprinkle with cheese, green onions, and cilantro.
  5. Broil for 3-4 minutes, watching carefully, until cheese is melted and begins to brown.  Cut into slices and serve immediately.

_MG_4039-1-2

Italian Chicken Cups


For those out in cyber space following this blog, THANK YOU!  I know I have been a terrible blogger this past year…. well let’s face it, a non-existent one would better describe me…. but I really hope I will find more time this year now that things are more settled here.  We moved a couple times, and life just got busy, but now we are in our new home and I am getting used to our new schedules and finding more time to do the things I love.  Anyway, I guess I haven’t done too bad, considering this year I still had close to 10 thousand views on this blog even though I only made one post lol.  Not bad at all.  Let’s see how many I can get this year.

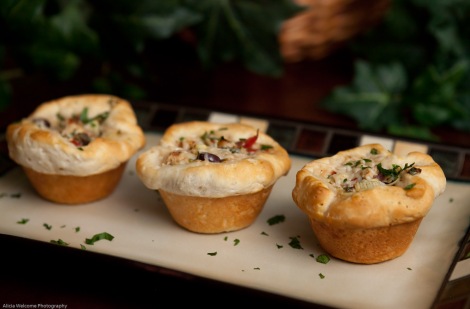
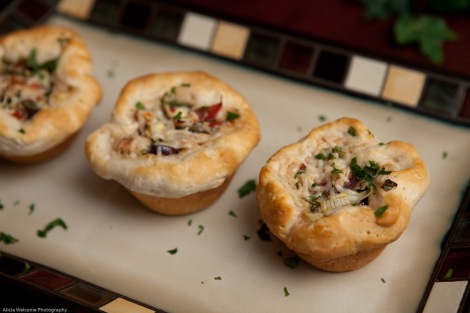
So for my first post in a very long time… I give you Italian Chicken Cups.  Nothing really complicated to make, but this is one of my own recipes, and I have to admit it’s a great one!  There is so much flavor packed into these adorable little bundles that you won’t believe how easy they are to prepare.  And the presentation is perfect for a dinner party with friends.  I make them as a main course, but I have had suggestions from people that have tried them that they might also do well as an appetizer.

Notes:  I have used various different kinds of biscuits for these, but I prefer the Grands ones by pilsbury.  There are 8 in a package and they are nice, big, and fluffy.  When I make the chicken I just season with salt and pepper, and a bit of Italian seasoning before grilling up on a counter top grill.

Italian Chicken Cups

serves 4-8             time to make : 25-30 minutes

Ingredients :

  • 1  large chicken breast, cooked (see note above)
  • 1 roll of refrigerated biscuits (see note above)
  • 1/4 cup sliced Kalamata olives
  • 1/4 cup artichoke hearts, diced
  • 2-3 T. roma tomatoes, diced
  • 1/2 cup zesty Italian dressing
  • zest of 1 lemon
  • juice of half a lemon
  • 1 T. fresh parsley, minced
  • 2-3 T. shredded parmesan

Directions :

  1. Preheat oven to 350 degrees F. and lightly spray 8 of your 12 muffin cups.
  2. Cut up chicken into small pieces, and combine with olives, artichokes, tomatoes, dressing, lemon zest, lemon juice, and parsley in a medium bowl.  Set aside.
  3. Using your hands stretch the biscuit out, keeping their circular shape until they are about twice the size.  Press into the prepared muffin pan allowing them to cup up out of the top and form a cup.
  4. Spoon filling into cups and bake according to package directions for your biscuits.  Using the Pilsbury Grands it is about 15 minutes I find in my oven.  In the last 5 minutes add the cheese to the tops if you want it to get melty, otherwise you can add it at the end.

_MG_4811-1-2
_MG_4817-1


Chicken Gyros, & Greek Inspired Pizza with Tzatziki!


I know it’s been a while since I have posted anything to this blog and I regret that, but the important thing is that I am here now posting up a fantastic recipe for all my followers to enjoy! 🙂

Quick rundown of life since I last posted.. been pretty busy with the holidays, recently going back on a diet, and we are in the process of selling our home in Idaho, and purchasing another here in Oregon.  As you can imagine life is hectic, and cooking is not always a top priority these days….. or at least it hasn’t been.  Like I said, I have recently gotten back on a diet (tracking calories) and so I am being forced to take a closer look at my food again and eat at home more often. For the most part I am repeating recipes I have made in the past and know to be lower in calorie, but as I come across others I will try to find the time to post them here again.

The recipe I am going to share with you today is definitely a winner, and by no means does it seem like “diet food”.  It rivals any traditional gyro I have ever had, and by using the chicken and controlling the ingredients by making it at home you are eating much fewer calories.  The process looks a little involved, but it’s more work to type it out than it actually is to make them I promise.  So whether you are dieting like me, or just love gyros I highly recommend making these tasty little treats in the near future!

*sorry if the pics are a bit dark…. I have a new computer and still figuring things out.  Calibration is something I haven’t really gotten to yet, and besides that I haven’t really found the sweet light in the apartment yet anyway 🙂

Chicken Gyros

For serving:
4 pita flatbread (I use Smart & Delicious traditional flatbreads)
diced tomatoes (about 8-10 cherry tomatoes)
diced red onion (about 1/3 cup)
parsley (about 1/4 cup, chopped)
feta (I used about 4 T. of the President Mediterranean Herb Blend)

For Chicken:
3-4 cloves garlic, minced
juice and rind of one lemon
2 tsp. red wine vinegar
2 T. olive oil
2 heaping T. nonfat greek yogurt (Fage O%, strained variety works best)
1 T. dried oregano
salt and pepper to taste
1 lb chicken breasts, boneless/skinless

Tzatziki:
2 C. nonfat greek yogurt (again the Fage 0% strained)
1 large cucumber, peeled with seeds removed and diced very fine
3-4 cloves garlic, minced
1 tsp. white wine vinegar
salt and pepper to taste (I like to use sea salt and white pepper)
lemon juice to taste (I use about a T. or so)

1. To make chicken combine the ingredients (other than chicken) in a bowl and whisk together.  Place chicken in marinade and toss to coat making sure it is fully submerged.  Cover and allow to sit in the fridge for at least 4 hours or up to 6.

2. To make tzatziki start by dicing your cucumber.  You want to make sure it is very fine since there will not be any processing as in some other tzatziki recipes.  Once you have it all cut up place it in the middle of a stack of paper towels and making a sort of pouch with the towels squeeze as much of  the excess water from the cucumber that you can.  You can repeat this step if you like.  Combine the cucumber with the remaining sauce ingredients and store in an airtight container in the fridge, allowing to sit for at least 2 hours before serving.  The longer it sits the more the flavors will marry as well.

3.  To cook the chicken preheat oven to 350 degrees.  Place chicken on a foil-lined baking sheet and bake 20-30 minutes or until the chicken is fully cooked through and juices run clear.  If you are working with thick breasts it can be helpful to pound them out a little before you marinate for faster cooking.  Once done allow to rest for a few minutes before slicing on the diagonal into strips.

 4. Assemble gyros by first warming flatbread in the microwave between some damp paper towels for about 20 seconds.  Place the warmed flatbread in the center of a square of foil on the counter.  Then place 2 T. of the tzatziki, a quarter of the meat, tomatoes, onions, parsley and feta.  Then fold the side over the other just enough for them to overlap in the middle.  Roll up in the foil bringing one end up to the center like you would for a burrito, and then tear the foil partway down all the way around the gyro to expose a bit of it.  This helps hold it together while eating and you just tear away the foil as you go.

As an added treat, I am also going to include my own little recipe for a mini pizza I have been enjoying almost daily.  I had extra from making the gyros and needed a lite lunch and this was the result…. the flavor in this little pizza is AMAZING and could easily be made into a full size pizza as well for everyone to enjoy.

Greek Inspired Mini Pizza with Tzatziki

1 flatbread (I use the same from above)
1 tsp. garlic flavored olive oil
course sea salt, just a pinch
dried oregano to taste
garlic powder to taste
Greek or Italian seasoning to taste
4-5 cherry tomatoes, thinly sliced
1 T. Mediterranean Herb Feta
3 T. prepared Tzatziki sauce

1. Preheat oven to 375.
2. Place flatbread on a small baking sheet and drizzle oil over one side. 
3. Season with the salt, oregano, garlic powder and Greek or Italian seasoning blend to taste.  I usually just take each and lightly tap over the entire thing until it’s covered.
4. Slice tomatoes very thin and arrange on top of your flatbread in single layer leaving a little space between slices.
5. Sprinkle the feta over top.
6. Bake for 15 minutes, and cut into 8 slices.
7. Top with tzatziki by dropping a bit onto each slice

Thanks for checking in and I hope you will stick around for whatever I have to share next!

Day 150 : Spicy Spud Crusted Chicken


This is one of my favorite chicken recipes.  I came across it a long time ago and though the idea was a bit weird to me I fell in love with the taste and texture of this.  It really is easy to make and there is so much flavor!  I haven’t done it yet, but I bet you could do other seasoning blends too and get great results…. maybe italian, cajun, greek, etc.  For the potato flakes I like using regular Creamy Butter style, but you could try whatever you like.  Normally you would cut the chicken into strip sized pieces, but I just pounded mine out a little tonight and left them as whole breasts.


Spicy Spud Crusted Chicken

Serves : 4                         Time to make : 40 minutes

Ingredients :

  • 3-4 large chicken breasts, cut into pieces
  • 1/3 cup butter, melted
  • 2/3 cup instant potato flakes
  • 3 T. (basically 1 pkg) taco seasoning
  • 1/8 tsp. cayenne pepper
  • 1/3 cup shredded parmesan

Directions :

  1. Preheat oven to 350 degrees and spray a 9×13 baking dish with cooking spray.
  2. Melt butter in a shallow dish and set aside.
  3. Combine potato flakes, taco seasoning, cayenne pepper, and parmesan in a second shallow dish.
  4. Dip chicken pieces in the butter first, and then roll into the potato mixture making sure to press the coating onto the chicken.
  5. Bake for 30 minutes or until done.


Published in: on June 11, 2011 at 6:12 pm  Leave a Comment  
Tags: , , , , , , ,