Coconut Oatmeal Cookies


I have always enjoyed all things coconut, so one night while browsing cookie recipes because I had a craving for something sweet I found these and knew I HAD to try them.  Besides the use of both coconut and coconut extract, both already promising for a very Coconutty cookie, I was intrigued by the use of coconut oil in place of butter.  Having read my fair share about the benefits of coconut oil both for the outside and inside of your body I was really excited about these.

These cookies are so incredibly good!  Not only do they deliver on coconut flavor, but the oil makes them so “buttery” without butter!  And you can’t help but feel like you’re doing something good for your body by indulging in one.. or two… or three!  They have a nice soft, but chewy texture.  I used walnuts, and really liked the combination, I just might add a few more next time.  If you go with the written instructions you’ll yield a lot of cookies out of this, and because there are so many the walnuts just seemed sparse in some.

Rather than scoop my dough onto cookie sheets, I actually rolled them into balls and then lightly pressed them flat onto the sheet which gave me better looking cookies.  This is especially nice if you plan to give some away.

_MG_1281-1 copy

Coconut Oatmeal Cookies

Ingredients :

  • 2 3/4 cup all-purpose flour
  • 1 tsp. baking powder
  • 1 tsp. baking soda
  • 1/2 tsp. salt
  • 1 cup light brown sugar
  • 1 cup granulated sugar
  • 1 cup coconut oil (measured solid) melted
  • 2 large eggs
  • 2 tsp. vanilla extract (or coconut extract, or do half and half which is what I did)
  • 1 cup shredded sweetened coconut
  • 1 cup old fashioned oats
  • 2/3 cup chopped walnuts (can also use pecans, sliced almonds, or macadamia nuts) optional

Directions :

  1. Preheat oven to 350° F.  Line a baking sheet with parchment paper or a baking mat.  Set aside.
  2. In a mixing bowl, mix together flour, baking powder, baking soda, and salt.
  3. In a separate bowl, cream together granulated sugar, brown sugar and coconut oil until fluffy.  Mix in the eggs and extract.
  4. Slowly add the dry ingredients to the wet and mix until just combined.
  5. Fold in the shredded coconut, oats and nuts.
  6. Scoop about a Tablespoon of dough at a time and place onto the prepared cookie sheets.  Bake for about 10 minutes or until very lightly golden.  Let cool for 2-3 minutes on the sheet before moving to a rack to cool completely.
  7. Store in an air-tight container.

Recipe from eat.drink.love

Published in: on May 30, 2015 at 2:17 pm  Comments (2)  
Tags: , , , , , , , , ,

Healthy Chinese Orange Chicken


Who doesn’t love a bit of Chinese takeout?  Problem is they are often pretty unhealthy, and sometimes you just have no idea what goes into it, but likely MSG.  I actually really enjoy recreating our favorites at home, and there are no shortage of recipes floating around the net from which to do so.

Although I have made other versions of Orange Chicken in the past in the more traditional way of a breaded chicken bite, and they were great, I was very excited to come across this recipe which eliminates the breading making it not only healthier but a thousand times easier!  This recipe was so easy in fact I could hardly believe it!  It’s also made with honey in place of some of the sugar which helps keep it lighter and better for you.

I honestly didn’t miss the breading, and felt this had a nice heat level and orange flavor.  We had ours with some rice, which I also like to take a little shortcut with and use boil in a bag.  For me it just turns out way better than our rice maker which I have yet to perfect.  Overall it was a great dinner and one I would make again!

_MG_1268-1 copy

Healthy Chinese Orange Chicken

Ingredients :

  • 2 lb boneless, skinless chicken breast cut into bite size pieces
  • 1 T. oil
  • 3 garlic cloves, minced
  • 5 T. Worcestershire sauce
  • 6 T. white vinegar
  • 1/4 cup honey
  • 2 tsp. brown sugar
  • 1/2 cup fresh orange juice
  • 1/2 tsp. fresh ginger
  • 1/4 cup green onions, chopped
  • 3 T. corn starch
  • zest from 1 orange
  • red pepper flakes to taste (I think I used about 1/4 tsp)
  • salt and pepper to taste
  • 1/4 cup red pepper, chopped
  • sesame seeds and more green onion slices for garnish (optional)

Directions :

  1. Heat 1 T. of oil in a pan.  Add salt and pepper to chicken and saute until chicken is no longer pink.  Remove any excess water or oil from the pan.
  2. In a saucepan mix together the rest of the ingredients minus the garnish.  Bring to a boil and stir a few times until the sauce thickens.
  3. Pour sauce over the chicken and mix thoroughly.  Serve.

Recipe from Clever Spoon

Garlic Shrimp Bake


I save a lot of shrimp recipes, but I realized I don’t often MAKE shrimp dishes.  Likely due to the cost of fresh shrimp, which can be pretty high.  I am not opposed to cooking with frozen shrimp, but it’s not my preference.  It’s just too watery, I hate thawing it, and they don’t quite live up to their fresher cousins.  Anyway, shrimp is something I really enjoy when I do get a chance to make it and this dish is no exception.

It has SO much flavor it’s unbelievable, especially considering how simple it really is.  Everything goes into one dish and gets thrown into the oven.  Of course you will want to make some bread to go along and sop up that amazing sauce in the bottom of the pan.  I also chose to whip up some orzo (which I flavored with a quick gremolata) because as usual my husband wouldn’t have called it dinner without some form of starch.  They all went very nicely together.

_MG_1244-1 copy

The shrimp has such a freshness to it from the lemon, garlic and parsley.  Then you get that heat from the red pepper flakes that really kicks it up a notch, while still having a sweetness to it as well.  The tomatoes become little jewels that soak up that liquid in the bottom and they literally burst in your mouth.

Though the cost of shrimp often leaves me a bit shocked, I would gladly pay it a little more often to enjoy such fantastic dishes as this.  This dish would also be a great dinner party addition, perhaps justifying the cost even a bit more.  If that wasn’t enough to convince you, I would even go so far as to say it’s a pretty healthy dish, with most of the fat coming from the olive oil which is said to be good for you anyway.  So with those great excuses, you have no reason NOT to go out and pick up some nice shrimp and treat yourself to this dish!

_MG_1246-1 copy

Garlic Shrimp Bake

Ingredients :

  • 1.25 lb shrimp, peeled and deveined (if you are making this for two as we did you could easily get away with a lb and not have such a crowded pan)
  • 3 cloves garlic, minced
  • 1/2 tsp. red pepper flakes
  • 3 T. lemon juice (I actually just used the juice of one lemon and the zest as well)
  • 3 T. olive oil
  • splash of white wine (about 2 tablespoons or so)
  • 1/4 cup chopped tomatoes (I used one roma tomato)
  • 1/4 tsp. salt
  • 1/4 tsp. pepper
  • 2 T. fresh parsley, chopped

Directions :

  1. Preheat oven to 375° F.
  2. Arrange all the ingredients except the parsley in an oven-safe skillet (cast iron works great for this).  Bake for 10 minutes, or until shrimp is done (depending on the size of shrimp you buy).
  3. Remove from oven, top with parsley and serve along side some bread or pasta.

Recipe from Nutritious Eats

Creamy Mushroom Pasta


I adore mushrooms.  I just love their earthiness.  A lot of people like them as a meat replacement in meals because they are fairly hearty.  This is completely ok with me, but my husband doesn’t quite agree.  Of course, the person who plans and prepares the meals has final say, and so sometimes he has to just put on his best game face and muddle through without meat.  Though he will often comment that a dish might be better with some meat added…. as is the case with today’s Creamy Mushroom Pasta in which he suggested pouring the mushrooms over some steak, he usually admits that it was pretty dang good and he can handle it without.

This particular dish is definitely satisfying and unless you’re a pure carnivore like my husband you won’t miss the meat.  When a dish calls for a lot of mushrooms I like to get a mix if I can.  Today I went with half and half cremini and white button mushrooms.  The recipe also left me with a choice to make regarding the cheese used, calling only for “tasty cheese”.  Knowing that it was an age old pairing I went with Gruyere, which if you are unfamiliar resembles a Swiss cheese.  Any Swiss cheese would be a good choice for this.  In fact I found an applewood smoked Swiss cheese at the store that I ALMOST went with but decided last minute on the gruyere…. maybe next time.

According to the blog in which I found this recipe it was created with an inspiration of removing the “cream of soup” aspect.  I never saw, or tried the original recipe, but I can definitely vouch for it’s success in producing a cream of mushroom soup taste, however with a definite fresher note.  I especially liked the thyme coming through in this… another age old pairing with mushrooms.  The dish holds up beautifully as leftovers, allowing me to enjoy it for lunch the next few days which is always a plus too.  One variation I might try next time is to add a splash or two of some white wine to bring a brightness and cut through some of the heaviness of the dish, but you definitely can’t go wrong with this recipe as written if you are in the mood for a great comfort dish!

_MG_1224-1 copy

Creamy Mushroom Pasta

Ingredients :

  • 2 T. butter
  • 1 tsp. cooking oil
  • 1 brown onion, peeled and chopped
  • 3 cloves garlic, peeled and chopped
  • 5 sprigs of fresh thyme
  • 400g sliced mushrooms (I used two 8oz packages from the store)
  • 4 T. all-purpose flour
  • 2 cups vegetable stock
  • 1 cup low fat milk
  • 1 cup tasty cheese (see note above)
  • 250g shell pasta, cooked according to package directions

Directions :

  1. Melt butter with a teaspoon of cooking oil in a large skillet over medium heat.  When butter begins to bubble, add onion, garlic and thyme. Saute until the onion is translucent and the garlic becomes aromatic.
  2. Add sliced mushrooms and mix well.  Allow the mushrooms to cook until their size reduces to about half and they are browned.  Sprinkle flour over the mushrooms and mix well.  Continue to cook, stirring for about a minute to cook out the raw flour flavor taking care not to burn it.
  3. Add vegetable stock, a quarter cup at a time.  Stir to combine each time and allow the mixture cook over a low heat and thicken between each addition.  Once all the stock has been incorporated, add the milk and again allow it to simmer and thicken. Once it resembles cream of mushroom soup add the cheese.  Cook until cheese has melted and the sauce becomes thick (like a velvety cheese sauce).  Season with salt and pepper to taste.
  4. Toss in the cooked pasta shells and serve topped with a bit more thyme.  Other optional toppings suggested are some red pepper flakes, parsley, or a bit more pepper.

Recipe from Fuss Free Cooking

Published in: on April 21, 2015 at 8:19 am  Comments (1)  
Tags: , , , , , , , ,

Missing Photos


Just a quick announcement/apology.  I noticed today, while browsing my site on my ipad, that some of my older images weren’t showing up.  I realized it was the images placed through an old photobucket account (most if not all the earlier shots), which ironically I can’t seem to get into to see what’s up.  I fear I have lost access to it since I signed up with an alias at the time.  Anyway, I noticed they do show up for me on my computer, so perhaps it’s another issue, but I just wanted to apologize as I know half of what draws someone into a recipe is the photo, and it just looks unprofessional to have them missing.  I will try to fix the issue, but it’s quite possible I won’t be able to figure it out.

Published in: on April 15, 2015 at 3:57 pm  Leave a Comment  

Strawberry Balsamic Pizza with Chicken & Applewood Bacon


When choosing recipes for my menu, and hopefully for my blog I often spend hours searching through thousands of them.  I don’t really go into a week of planning with specifics in mind, I like to stay pretty open to whatever catches my eye.  Among the many that just don’t make the cut are some that I like to save for a later date for one reason or another… perhaps they are a bit too indulgent for my current eating habits, or would be great for a nice meal, or other times they just look so interesting to me that I can’t help but save them to reconsider later on.

Tonight’s recipe falls under the last category.  While the idea of fruits in savory dishes is most definitely not a “new” thing, it is somewhat foreign to me.  I guess it’s just hardwired into my brain that they are sweet… and thus best suited for desserts.  Of course this is not true, and through my experimentation I have come to realize this, but there are still plenty of fruit and savory combinations I have yet to try…. perhaps someday.  One that had been a long time on my list was strawberries and balsamic vinegar.  When I saw this recipe it just really stood out, and I knew I HAD to try it.  Not only do we love gourmet pizzas, and want to try the flavor combo, but it also has bacon!  Who could ask for more!?

_MG_1180-1 copy

Let’s just say…. I was NOT disappointed.  In fact I could easily put this up there in my top favorite pizzas.  It has such a freshness to it from the strawberries and cilantro, balanced perfectly with the sweet, tangy and ever so slightly spicy sauce (which according to my husband tastes like BBQ sauce, but perhaps a fruity version) and salty crisp bacon.  Plus, it’s a gorgeous pizza with all the colors, and sure to impress.  I honestly would not change a thing about this recipe or even embellish it.  I plan on making this one over and over again.

_MG_1199-2 copy

Though I wouldn’t change anything, there are a couple places that leave some room for versatility based on what you use.  For the crust I used a Stone Fire flatbread (multigrain) which I found in my local grocery store.  And for the strawberry jam I went with Santa Cruz Organics Strawberry Spread, which I feel is a little fresher/less sweet than some of the popular brands.  As I mentioned above the sriracha lends just a HINT of heat to this, and it was great as is, but I would also like to try it with a bit more and see what that does in terms of balance as well.  For the cheese I used an Italian Blend, pre-shredded.  Feel free to over-estimate your ingredients like I tend to do and really pile them on there… mine was kind of heaping when I got it all on there because my crust was already perhaps a bit smaller than a typical “ball of dough” would yield and I get a bit heavy handed.  As long as you have a crust that can stand up to it, I say the more the better!

_MG_1150-1 copy

Strawberry Balsamic Pizza with Chicken & Applewood Bacon

Ingredients :

  • 1/2 cup strawberry jam or preserves
  • 1/4 cup balsamic vinegar
  • 1 tsp. Sriracha Chili Sauce
  • 1 ball pizza dough
  • 1 cup diced or shredded cooked chicken breast (I used rotisserie)
  • 1/2 cup applewood smoked bacon, cut into 1 inch pieces, cooked
  • 1/2 cup thin sliced sweet onion
  • 12 oz. shredded Italian blend cheese (I used closer to 6-8 oz because my crust was smaller)
  • 1/4 cup fresh cilantro, finely chopped
  • 1/4 cup fresh strawberries, diced small

Directions :

  1. Place pizza stone or sheet pan on middle rack of oven.  Preheat to 450 degrees (I was making other things at the same time and with a pre-baked crust I just left mine at 400 which worked great)
  2. Place balsamic vinegar in a small saucepan.  Bring to boil, then reduce heat and simmer 4-5 minutes or until reduced to half of original volume and mixture is thick and syrupy.  Add strawberry preserves and Sriracha and mix well.  Set aside to cool.
  3. Pat or roll out pizza dough on lightly floured surface to approximately a 14 inch circle.  Place a piece of parchment paper, slightly larger than your dough, on a pizza peel or upside down sheet pan (to help in transfer).  Sprinkle parchment paper lightly with cornmeal.  Fold dough in quarters and place on parchment paper, then unfold.  (Or if you are using ready made crust like me forget all that)
  4. Combine chicken with 2 T. of the balsamic-strawberry mixture and mix to coat all chicken with sauce.  Pour rest of sauce onto pizza dough and spread to cover, leaving 1 inch border on edges.  Scatter chicken evenly over the sauce.
  5. Place about 3/4 of the cheese on top of dough and spread to cover sauce evenly.  Scatter bacon and sweet onion over cheese.  Scatter remaining cheese over this layer.
  6. Slide parchment paper with pizza on top onto stone or cookie sheet.  Bake for approximately 8-10 minutes or until cheese is bubbly and crust is golden brown.  Watch carefully, at this temperature it is easy to burn the pizza. (I only had to bake mine the same amount of time at 400 with the pre-made crust)
  7. Remove from oven and let cool slightly, 1-2 minutes.  Sprinkle with chopped cilantro and fresh diced strawberries and serve!

Recipe from The Cafe

Italian Chicken Pasta Salad


Tonight’s dinner is one of those super simple dishes that can be thrown together with little effort and very little actual cooking as well, which makes it the perfect weeknight meal.  It also makes great leftovers for lunch the following days.  This is yet another recipe that takes advantage of the ever-convenient and delicious rotisserie chicken…. one of my favorite cheats!  I suppose you could make your own chicken if you wanted, but last I checked there were no awards being handed out for causing yourself unnecessary hassle and making it from scratch lol.

_MG_1126-1 copy

The concept of this dish is pretty basic, with many of the usual Italian ingredients… and that’s ok.  Sometimes you just don’t need to mess with a good thing.  I really enjoyed this salad, and would definitely make it as is over and over again with complete satisfaction.  I can also see room for embellishments too if you wanted to mix things up from time to time.  Perhaps some crispy proscuitto, maybe some parsley or lemon… or whatever other Italian ingredients you like.  The only change I made to the original recipe was to use half kalamata olives just because they are my favorite and I happened to have some of both in the fridge I needed to use up.  Another area of versatility is in the dressing.  With so many options out there this could easily take on a lot of different flavors.  I used some Olive Garden Italian dressing I had on hand which I really love because it’s so creamy and cheesy.  You can also use whatever type of pasta you prefer.  I used some orecchiette, which is great for catching the dressing in the little bowl shaped centers.  The only downside is that they tend to stack up in there.

I cut the recipe in half and still had LOTS of food, so take that into consideration.  This would feed a lot of people, but like I said it can also make good leftovers.  I actually made mine earlier in the day and let it hang out in the fridge for a few hours before I served it.  I did sneak a taste right away before putting it in there, and I gotta say I really liked it with slightly warm pasta.  However, it’s still very good totally chilled.  It’s not a bad idea to reserve a bit of dressing to mix in later on just in case it seems a bit dry after sitting so long.

_MG_1131-2 copy

Italian Chicken Pasta Salad

Ingredients :

  • 1 pkg. (16 oz) pasta
  • 3 cups chopped rotisserie chicken
  • 1 can (14 oz) artichoke hearts, diced
  • 1 can (6 oz) sliced black olives
  • 1 tub (8 oz) mozzarella pearls
  • 1 pint grape tomatoes, halved
  • 1 cup torn or julienned basil
  • 1 cup shaved parmesan
  • 1/2 tsp. salt
  • 1/2 tsp. black pepper
  • 1 bottle (16 oz) Italian salad dressing, divided

Directions :

  1. Cook pasta according to package directions until al dente.  Rinse under cold water and drain well.  Pour pasta into a large mixing bowl.
  2. Add the remaining ingredients, reserving about 1/2 cup of the dressing.  Mix to combine.
  3. Serve or refrigerate until ready to use.  (Pasta may dry out upon standing. Add reserved dressing if needed)

Recipe from In Good Flavor

Pan Seared Salmon with Chive Dill Butter


So I know it’s been a while again since my last post, but what can I say….. I just get busy and unfortunately my blog and even making new recipes in general takes a back seat for a while.  But I always come back!  I left off with my first installment of a new project called Kids in the Kitchen, and though I haven’t had time to fit in another between busy school schedules, mini vacations and illnesses it’s still on my to-do list so be watching for that!  In the meantime I am hoping things have settled down enough that I can focus on making new and, in keeping with my current mindset of eating lighter and losing some of this holiday weight, healthier recipes.

First up on the menu is this Pan Seared Salmon with Chive Dill Butter.  I will share my technique/recipe below, but this is one of those great recipes that has a lot of versatility.  All you’re doing is preparing a piece of salmon and mixing whatever flavors you want into some butter to top it off.  Super simple.  I served this with some grilled asparagus drizzled with olive oil and salt and pepper, and some smashed potatoes.  This was my first time trying smashed potatoes and all I can say is now I am a believer!  So good, with a crispy outside, seasoned just right, and soft in the middle….. but let’s get back to the salmon lol.

I will admit, I have struggled to cook salmon in the past.  It’s not particularly hard, but cooking fish in general takes practice to get it done right where you get that nice crust on top and the fish is nicely cooked through.  I have either had it stick in my pan, or ended up with somewhat undercooked fish in the middle of a nice thick piece of fish.  With time, however, I have gotten the hang of it.  Although I switched over to stainless steel cookware some time ago to cut down on my use of non-stick and their chemicals. fish is something I pretty much always use nonstick for.  Specifically, I use a a Rachel Ray Anodized Nonstick skillet and it works beautifully for giving me a nice crust, but avoiding the dreaded stick.  Another very important tip when cooking fish to ensure it doesn’t stick and gets great crust is to leave it alone once you have placed it in the pan.  It may be tempting to lift the edges to check, or slide it around to see if it’s sticking but don’t.  Trust me.  And don’t forget to use oil or butter or something to grease your pan.  Once it’s done on one side according to your recipe’s directions flip it once and again leave it alone til it’s time to come out.  It also helps to take your fish out a few minutes early to bring the temp up just a bit before you start, and make sure it’s dry…. especially if you are cooking with previously frozen fish.  Of course, as with pretty much all food, seasoning is important, so don’t forget to season before you place it in the pan!

Now that we talked a bit about cooking a nice piece of salmon, let’s talk about the butter…. as I mentioned it’s a versatile method.  You could put whatever herbs or seasonings in this you like.  The butter will melt beautifully over the warm fish and give that richness that takes a boring piece of fish to a whole new level, imparting the flavors you incorporated at the same time.  For this recipe I used some fresh chives, dill, garlic, lemon and some salt and pepper.  It’s important to start with room temperature butter for this, so don’t forget to take it out in advance.  You could even make the butter in advance and either use it hard from the fridge, or take it out a little before for a softer butter…. and any leftovers can be used on other meats, bread, or whatever sounds good to you.

As a natural casualty to having to photograph my food before I can eat it my salmon had cooled a bit while I was setting up so my butter wasn’t melting over it right away as I would have liked for the photos, so you’ll have to use your imagination a bit.

_MG_1079-1 copy

Pan Seared Salmon with Chive Dill Butter

Ingredients :

  • salmon fillets (about a lb) * I used salmon with the skin
  • 1 T. olive oil
  • salt and pepper to taste
  • 2-3 T. butter, at room temp * I just eyeballed how much butter so this is estimation
  • drizzle of olive oil (about 1/2 tsp. perhaps)
  • fresh chives, chopped (about 1 tsp. or so)
  • fresh dill, chopped (about 1 tsp or so)
  • salt and pepper to taste (separate from the salt and pepper above)
  • garlic clove, minced
  • lemon zest
  • Lemon wedges (for serving with the fish)

Directions :

  1.  Make your butter first.  To your room temp butter add your herbs, a drizzle of olive oil, the garlic, lemon zest (by preference but about a tsp or so), and some salt and pepper.  Using a small spatula sort of stir/whip it up until well combined and set aside.  If making ahead put back in the fridge.  You can either use it straight from the fridge later on, or let it warm up just a bit so it’s a little softer.
  2. Prepare you salmon.  If you are using previously frozen salmon be sure to pat dry before you start.  Season your salmon with a bit of salt and pepper (I like to use coarse salt when seasoning meat).  If you are using salmon with skin you don’t need to season that side, but if not I would suggest doing both sides.
  3. Heat the T. of oil in a nonstick pan over medium-high heat.  If using skin-on salmon place it in your pan skin UP so you get the nice crust from that first bit of heat on the top of your fish first.  Once you have set your fish in your pan DON’T TOUCH IT for about 4-5 minutes.  You see the fish start to turn opaque towards the middle and the edges will start to brown.  Flip it and cook an additional 4-5 minutes.  Of course the cook-time depends on the thickness of your fish, so take that into consideration, and watch for the fish to become opaque all the way through.
  4. Remove from pan and top with a dollop of your prepared butter.  Serve immediately with lemon wedges.

Note : Amounts for the herbs in the butter are estimations and I encourage you to use more or less to your tastes.  I like a nice punch of flavor and likely used more than stated above.

Project Kids In The Kitchen : Pizza Night


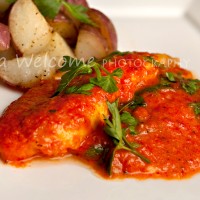
Food is such an important and amazing part of life.  I feel bad for those who are not truly enjoying their food, and think of it only as a necessary substance to fuel their bodies.  Of course it does that, but it is so much more.  Food brings people together, and makes memories that last a lifetime.  Food comforts you.  Food shows people you care.  It excites and impresses them.  Food can take you on a journey, or make you step out of your comfort zone.

Obviously I love food.  So it kills me that my own kids don’t share that appreciation of trying new things.  They are crazy picky, and each has a small list of foods they typically eat.  I do have hope that someday they will come around, since I was admittedly a bit on the picky side myself as a kid, but I just don’t want them to waste so much time getting around to it.

My mom was a great cook, and knew the recipes in her repertoire like the back of her hand, never using a recipe or measuring things.  She wasn’t one to deviate too far from her comfort zone though, and so I wasn’t exposed to many different foods as a kid.  My kids have the opportunity to try a lot of different things, but getting them to do so is often like pulling teeth.

I have thought long and hard on many occasion about ways to make my kids try food, and always come up empty handed.  Ideas I thought would work, failed miserably, and I am left feeling discouraged and annoyed.  It occurred to me that I wasn’t really adventurous in my food choices until I got out on my own and started having to cook for myself.  I know as you age your palate matures, and so they wouldn’t appreciate some of the dishes I typically make, but I began to think MAYBE, if I could get them involved with what I was making they would not only learn valuable lessons in the kitchen that would serve them their entire lives, but maybe they would also be a bit more adventurous in their food choices.

So with loads of ideas racing through my mind I decided to carve out a part of this blog to hopefully share with all of you their transformation into little foodies with a jumpstart on kitchen skills…. or at least more tolerable eaters lol.

                                                                 ~~~~~~~~~~~~~~~~~~~~~~

For our very first installment of what I am calling Project Kids In The Kitchen (or KITK) I decided to go with something that I knew would be fun to make, and also something I knew at least one of my kids was crazy about.  I am planning to ease them into the more adventurous stuff later on.  As I mentioned, KITK is not just about trying new foods, but also teaching them valuable kitchen skills that they will use the rest of their lives, and hopefully help them skip over that period of time when kids first start out on their own and their best friend becomes a microwave when they no longer have mom to cook for them.  So in honor of my oldest’s favorite food, it was PIZZA NIGHT!

It made me excited that the kids were so excited about KITK.  My youngest asked for days each morning when he got up if it was that day.  In order to make a lasting first impression I went all out.  We made everything from the sauce (well one of them anyway, let’s not get TOO ambitious on our first run lol), to the dough, and grating our own cheese (more to come on that).  It was definitely a success, but there was an added bonus I wasn’t really planning on of just some good quality family time spent together.

Probably the hardest part was trying to document the process at the same time through photographs.  Not only is the light dreadful in my kitchen, leaving me quite restricted in where and how I could set up, but it’s not easy running back and forth to take pics while trying to teach, so I enlisted the help of my husband as well.  I apologize in advance for what will probably be a lot of pictures….

Things we learned today :

  • How to properly measure flour
  • The importance of dry and wet measuring utensils
  • How to make White Sauce
  • Time management and planning ahead
  • How to use yeast
  • How to knead dough, and flour our surface
  • How to roll out dough
  • Stove safety, and they watched me fry some proscuitto, and wilt some spinach
  • How to use a cheese grater… and how not to.
  • The art of assembling a pizza
  • Following a recipe, and directions

We started off by making the white sauce for my youngest’s pizza.  Even with this option pizza is usually a hit or miss for him, so I wanted to make sure I gave him his best shot to succeed with this.  We made just a basic alfredo sauce with butter, cream, and parmesan cheese.  And very importantly… we each tasted it when we were done.  This is something I want to encourage when cooking so they are not only more mindful of what they are making and how flavors go together, but of course to trick them into trying new things lol. Here are two eager boys (though you won’t be able to tell from their cheesy and bored expressions in these photos lol) ready to get started! _MG_0964-1 And diving right in! _MG_0978-2 _MG_0982-4 Once that was done we moved on to the dough.  We made two batches so we’d have enough for 4 pizzas.  I decided the best way was to show them how with the first batch, and then let them do the second while I took pics.  While they waited for my yeast to activate I had them measure out their flour so we’d be ready. _MG_0986-1 Watching the yeast provided some excitement… though they weren’t much impressed by the smell lol. _MG_0988-1 Once our dough was mixed, it was time to knead.  This proved a bit difficult for them, but they gave it their best shot anyway before I finished them up. _MG_0993-1 _MG_0994-2 Dough is proofing in the oven while we clean up and get ready for the next step. _MG_0996-3 Time to master the cheese grater… or in my youngest’s case, learn some respect for it!  Even though he knicked himself a little, he was a great sport and didn’t let it keep him from trying again, and it’s good that he learned this lesson.  Heck, who hasn’t cut themselves with a knife, or knicked themselves with a grater or peeler before?  As you can see they took these tasks very seriously lol. _MG_0999-1 _MG_1002-2 _MG_1005-3 Our dough was ready to roll out, but first the kids thought it was hilarious that we had to punch it down…. it’s the little things lol. _MG_1009-1 _MG_1010-2 _MG_1014-3 _MG_1021-4 Now comes the fun part of assembling the pizzas!  We had a mini success before we even finished because both kids tried proscuitto and spinach, with the youngest even opting to make one slice of his strictly cheese and white sauce pizza have some torn up proscuitto on it (which he loved). _MG_1022-1 _MG_1024-2 _MG_1025-3 Masterpieces ready to go in the oven!  And of course a shot of the final product for good measure.  Also not shown, we made two other pizzas for my husband and I.  His was some meaty concoction of course, and mine was my attempt to copy-cat my favorite pizza from The Rock. _MG_1031-1 _MG_1034-2 _MG_1035-3 _MG_1037-4 When all was said and done… and it was sort of a long day in the kitchen for sure… we all had a great time, and everyone enjoyed the pizzas they made from scratch.  Thank you for making it through this long, and I suppose personal post.  I hope that our adventures in the kitchen inspire many of you to get your own children in there as well, and I would love to hear about it from you!  Time to start planning our next dish!

Pasta with Shrimp, Lime & Saffron


Whenever I make a dish with fish or shellfish in it I just feel like I am eating better.  Obviously that is not always the case, but generally I do feel it holds some truth.  Fish and shellfish are both very low calorie and fat, and generally are prepared in ways that keep things light and fresh.  Despite the large amount of olive oil in this dish (but keeping in mind olive oil IS good for you lol) I do feel like this is a pretty light, yet satisfying dish.  The nice fresh, slightly sweet taste of the shrimp pairs perfectly with the bright tangy and spicy sauce.

Let’s talk about saffron for a minute.  It is the most expensive spice on the market and most people have probably never tried it.  It is actually the stigma of a certain type of crocus.  It lends a sort of sweetness to a dish, and a little goes a LONG way.  When you buy it you often get a tiny amount and you really only need a few threads for a dish.  If you just can’t justify spending so much on a spice, I think this dish would still be a winner without it, but if you’re curious definitely give a shot!  It will probably last you a long time because not many dishes call for it.  A tip I found for dispersing the flavor more evenly in your dish is to soak the threads for about 5 minutes in a teaspoon of warm water or white wine to then be used in your dish.

The recipe I followed actually had a slightly different name (Pasta with Scampi, Lime & Saffron), but I don’t think it’s correct.  When I think of scampi I think of shrimp cooked in a garlic butter sauce, and there is no butter in this dish.  There is however a good deal of garlic.  Don’t shy away from it, it’s not nearly as intense as it seems lol.  I used a shallot as my onion for a more mild onion flavor.  The recipe was also originally written for a full lb box of pasta, but I used a bit less (11oz).  I didn’t end up needing any pasta water to thin my sauce out, but don’t forget to hang on to it just in case.  The recipe I followed called for Nolly Pratt, but I have no idea what that is (however they referenced white wine in the article so that’s what I went with), instead I used a chardonnay.  And, as always, if you can get your hands on some nice fresh shrimp that would definitely be best.  However frozen is fine too.  I wanted to leave the tails on for a prettier picture, but the part of me that can’t stand food that is a hassle to eat won in this case.

_MG_0922-1 copy

Pasta with Shrimp, Lime, & Saffron

Ingredients :

  • 12 oz. linguine
  • 1/4 cup olive oil
  • 18 medium sized shrimp (about a lb)
  • 1 onion finely chopped (or shallot)
  • 8 garlic cloves, thinly sliced
  • 100 ml white wine
  • few strands of saffron (remember a little goes a long way)
  • zest of 2 limes
  • juice of 1 lime
  • 1 tsp. chili flakes
  • 1/4 cup freshly chopped parsley
  • 1/4 sliced green onions
  • black and white sesame seeds for garnish
  • salt and pepper to taste

Directions :

  1. Clean, devein, and prepare shrimp how you like them.  Salt and pepper them.
  2. Heat a skillet over medium to medium-high heat with a bit of your oil and cook shrimp on each side for about a minute and set aside.  They should be mostly cooked through because they won’t cook much longer after this, but remember shrimp are easy to over-cook.
  3. Add the rest of your oil to the skillet and saute onions for a few minutes until softened.  Add garlic, chili flakes and saffron (on medium so your garlic doesn’t burn) and cook until fragrant.
  4. Add white wine, and scrape any bits off the bottom of your pan.  Bump it back up to medium-high and let it simmer for a couple minutes.
  5. Meanwhile, cook pasta according to package directions and reserve some of the starchy pasta water to thin your sauce as needed.
  6. Add to your pan the chopped parsley, lime zest, lime juice, green onions, and drained pasta.  Add a little of the pasta water at this time (only if necessary) as well.
  7. Add your shrimp, toss to coat, and heat through… make sure your shrimp are now fully cooked through.
  8. Garnish with a sprinkling of black and white sesame seeds and a wedge of lime.

Recipe from My Kitchen Treasures


Tamale Pie


As it sometimes goes, I ended up with a recipe that while I am not sure it turned out as intended, it did taste really good.  I debated for a long time whether or not I should blog it, but with an enthusiastic 5 star review from my husband I decided in favor of sharing and just explaining my experience.

On the menu tonight was Tamale Pie.  I am also going to admit upfront that I don’t know if I have ever eaten a traditional tamale….. so I honestly can’t say how similar it is to the real thing.  My husband, however, has and he even made a comment that he enjoyed the cornbread over the traditional variation.  My issue tonight was definitely not with flavor, which was great, and very comforting, but rather with the texture of the cornbread.  It was just really soft, and almost mushy.  It could be as simple as just allowing it to cook longer initially (though I did make sure it was set up before pulling it out) or even using less enchilada sauce to keep a more firm texture.  Perhaps I was even wrong in my assumption that it should retain texture, since the idea IS to soak the enchilada sauce into it.  I do think it would be even better though with a more firm cornbread, or at least more presentable.

As I said the taste wasn’t compromised at all by the mushy cornbread, it just didn’t look very good on the plate lol.  In fact, I am including a shot of my slice for you, and you’ll see what I mean.  Because it was mushy on day one, I had feared it would be gross for leftovers, but by reheating it in a cake pan in the oven the next day (at 350, covered for first half) I was able to keep it from getting mushier and it tasted pretty much exactly the same on the second day.  I am sure you can use the microwave if you wanted, but I just really loathe what microwaves do to food lol.

Let’s quickly talk toppings… I think you can really go with whatever floats your boat so to speak.  I went with a chunky salsa, cilantro, black olives, sour cream, and green onions.  The recipe also says cheese of choice, but like the original blogger, I went with a sharp white cheddar.

_MG_0908-1 copy _MG_0915-2 copy

Tamale Pie

Cornbread Ingredients :

  • 1/2 C. cornmeal
  • 2/3 C. flour
  • 3 T. sugar
  • 1 T. baking powder
  • 1/4 tsp. salt
  • 3-4 T. oil (I used olive oil)
  • 1/3 C. milk
  • 1 egg
  • 1 small can diced green chiles
  • 1 can creamed corn

Meat :

  • 1 lb. ground beeef
  • 1 tsp. cumin
  • 1 tsp. chili powder
  • 1/4 tsp. salt
  • 1/4 tsp. pepper

Tamale Pie :

  • 1 1/4 C. enchilada sauce
  • 2 C. shredded cheese
  • toppings of choice

Directions :

  1. Preheat oven to 400 degrees F.
  2. Whisk together cornmeal, flour, sugar, baking powder, and salt. Add oil until soft crumbles form. Whisk in milk and egg. Gently fold in chiles and corn. Pour into greased baking pan (9×9, 9×13, large cast iron skillet). Bake until set, about 20-25 minutes.
  3. While cornbread is baking, combine beef with spices and sauté in a skillet over medium heat until fully cooked, about 10 minutes. Drain and set aside.
  4. Once cornbread is done baking, reduce oven to 350 degree F. Poke holes in cornbread with a fork and pour enchilada sauce over it. Top with ground beef and shredded cheese, and cover with aluminum foil. Bake in oven for 20 minutes. Remove foil and back until cheese begins to brown, about 5-10 minutes.
  5. Let cool for 10-15 minutes before serving with desired toppings.

Recipe from 2 Teaspoons

Published in: on January 29, 2015 at 7:00 pm  Leave a Comment  
Tags: , , , , ,

Chipotle Lime Chicken Bacon Flatbread Tacos


That name sure is a mouthful, but nothing compared to the actual mouthful you get from these delicious gourmet tacos.  They are definitely a bit on the labor intensive side, but I consider truly good food to be a labor of love.  The great thing is you can easily make this in pieces ahead of time.  Myself, I spaced things out through the course of the day…. marinating my chicken and making the sauce when I got up.  Then midday I made my bacon… in the oven of course which I have talked about more than once on this blog.  When it came time to really get down to cooking I still had a few tasks to get through, but it wasn’t quite as chaotic as it probably would have been.  Let’s just say multitasking in life is a forte of mine I like to think, however multitasking in the kitchen…. not so much!  This is why I like to get everything ready BEFORE I start cooking. I LOVED these tacos…. if you can call them that.  As the blogger from whom I got this recipe mentioned, there is not really a good way to fold over such an overflowing mountain of goodness in a taco shell…. but I guess if you must you can just go lighter on everything to make it fit better.  I piled mine HIGH both for the picture aspect and because I knew I was only going to eat a couple so wanted to get my money’s worth!  I was thinking these would make a great taco bowl though if you want the best of both worlds.  You do want the thicker shell though.  The recipe calls for flatbread, but I was able to find very thick handmade taco shells at my local grocery store that worked perfectly and I imagine folded up a bit easier than flatbread would. There is an overwhelming amount of flavor packed into this taco.  You get the smokey heat of the chipotle, the acidity and brightness of the lime, the creaminess of the avocado and sour cream, the freshness of cilantro (my addition) and other toppings, and then who could forget the bacon….. mmm the bacon!  This is definitely not your average taco, but rather one to impress with….. my husband sure seemed to be! I took the suggestion of melting my cheese directly onto the chicken under the broiler for a minute and that worked perfectly, keeping the cheese from falling out… brilliant!  To keep all my goodies on top I also spread the chipotle sauce onto the tortilla first (which I heated beforehand until started to brown/firm up a bit) and that acted as my glue for the chicken.  The recipe does suggest lettuce as a topping, but I decided to just leave it out.  I honestly don’t think it is necessary at all.  For cheese I chose pepperjack.  The recipe doesn’t really say how much bacon to use… I cooked up about 9 slices and we used that for about 6 tacos, which allowed us a fairly generous amount on each.  It also doesn’t specify type of onion, but I suggest red/purple onion for this, it just goes so well with the flavor profile. _MG_0863-1 copy copy

Chipotle Lime Chicken Bacon Flatbread Tacos

Chicken Marinade:

  • 4 chicken breasts (I used about 1lb total)
  • 3 T. chipotle in adobo, smashed up or pureed
  • juice from 2 limes
  • 1 T. light oil (I used evoo)
  • 1/2 tsp. salt

Chipotle Sauce:

  • 1/2 cup sour cream
  • 2 T. chipotle in adobo, smashed or pureed
  • 1 clove garlic, minced
  • 2 T. lime juice
  • pinch of salt

Guacamole:

  • 2 avocados
  • juice of 1 lime
  • 1 T. onion, chopped (I used a bit more)
  • 1/4 C. tomatoes, chopped (I used roma, with seeds removed)
  • 1 garlic clove, minced
  • salt to taste

Other Taco Components:

  • flatbread (note above, I used thick small tortillas, and we made 6 generously filled tacos)
  • cooked bacon
  • cheese
  • optional toppings : additional chopped tomatoes, onion, cilantro, avocado, etc.
  • Lime wedges

Directions :

  1. Combine the lime juice, chipotles, oil, and salt for the chicken and marinade the chicken and then grill it. When it’s done, chop it up small and toss it with more chipotles in adobo sauce if you want it spicy.
  2. Combine all the ingredients for the chipotle cream sauce and set aside.
  3. For the guacamole, smash up one avocado and then add the lime, garlic, onion,  tomatoes, and salt and mix well. Chop up the remaining avocado and stir it in, smashing it up slightly.
  4. Assemble tacos for best results… heated flatbread/shell, chipotle sauce, chicken and cheese (melted together), guacamole, other toppings and bacon.  Serve with wedge of lime.

*Remember you can do multiple steps earlier in the day when you start your marinade cutting back on the workload later.  You do want to make the guacamole just before assembling however, because it will start to brown (though with that amount of lime juice not quite as quickly as without). Recipe from Yammie’s Noshery

Skinny Capellini Carbonara


In my last post I covered that all too familiar scenario where you plan out your meals and realize when you’re at the store that you can’t get certain ingredients.  Similar to that, I often find that I can’t find a specific version of something.  This can become a major issue for a less experienced cook because if you do have to substitute you may find that you need to tweak the directions in order to get a good result.  In this case, it was proscuitto.  Although you can get thinly sliced proscuitto at nearly every store around me, I have yet to see it in a form that would allow me to dice it up.  I have a feeling you need a specialty store, or butcher for that sort of thing.

Anyway, with really no other options, I decided to just go with the thinly sliced stuff, which thankfully I am familiar with.  If you put a thin slice in a hot skillet it will sort of wrinkle and curl up and though it will cook, it won’t be very even.  I decided instead to pile it up and just roughly cut it up, allowing it to stick together and form bits.  I also don’t think you get the amount of fat in the skillet that you would if you were using a thicker cut, so I added just a bit of olive oil to my skillet to get it going.  As it cooked, I stirred it around pretty constantly as I didn’t want areas to overcook, which can happen quickly.  I cooked it over medium or even a little lower for about 5 minutes until it started to crisp up and all the fat pieces loss that chewyness I don’t enjoy.

The packages at my store came as 3oz, which I think is pretty standard, so I grabbed 2… and because I had nothing in mind for the leftovers I used it all.  I figured my husband especially would appreciate the extra in a pretty simple dish.  It was good that way, but the proscuitto does add a good deal of saltiness to the dish, so if you aren’t big on salty foods I would stick to 4oz as I am sure it would have been plenty.  The other substitute I made, if you can even really call it that, was to use shredded Parmesan instead of grated because I already had that and shaved and didn’t want to purchase a third variety.  I just ran my knife through it a bit until it was closer to grated texture and that worked out just fine.  The recipe states that you could need additional pasta water to thin your sauce, but I definitely didn’t find that to be the case, it was nice and thin with just the 1/2 cup.  For the capellini, I used thin spaghetti, and mine was actually a vegetable variety which I hadn’t tried before.  I have never seen capellini in my stores, but I am pretty sure there really isn’t much if any difference between the two, or you could even use angel hair pasta.

Now for the review…. I have to say I didn’t expect to like this as much as I did!  I had hoped I would of course, but I guess having the word skinny in the title just makes you assume it’s going to be bland at best.  The proscuitto adds so much flavor to this dish, and especially if you use 1 1/2 the amount like I did lol.  The peas give that nice counter balance of freshness to the decadent and velvety smooth sauce.  All in all, a fantastic pasta dish!  This is also a very quick dish to prepare which is perfect for most people on a busy weeknight.

_MG_0838-1 copy _MG_0840-2 copy

Skinny Capellini Carbonara

Ingredients :

  • 1/2 lb capellini pasta (sub thin spaghetti or angel hair)
  • 4 oz. proscuitto, diced
  • 1 clove garlic, minced (I doubled that)
  • 4 large eggs, at room temp
  • 1/2 cup freshly grated Parmesan, at room temp
  • 1/8 tsp. kosher salt
  • freshly ground black pepper
  • 1/2 cup pasta water
  • 1/2 cup cooked peas
  • additional Parmesan for top

Directions :

  1. In a large skillet over medium heat, brown the proscuitto until golden, approximately 5 minutes. Add the garlic and cook for one minute. Turn off the heat. (See notes above if you had to use thinly sliced proscuitto)
  2. In a large pot of salted boiling water, cook the pasta until al dente. Approximately 2-3 minutes (or according to package directions if you substituted another pasta)
  3. While the pasta cooks, whisk the eggs with the cheese, salt and pepper. Slowly whisk in 1/2 cup of pasta water to the eggs to temper them. (So they don’t scramble when mixed into the pasta.)
  4. Remove the pasta with a slotted spoon and transfer to the skillet with the proscuitto. Mix the pasta with the fat and proscuitto and then slowly add the eggs to the pasta while stirring constantly. If the pasta still seems dry add another 1/4 cup of the pasta water and stir until cream. Fold in the peas and serve immediately.

Recipe from The Suburban Soapbox

Published in: on January 13, 2015 at 7:42 pm  Leave a Comment  
Tags: , , , , ,

Thai Quesadillas With Grilled Chicken


You know the feeling…. the one where you made the effort to plan well thought out meals for the week, made your grocery list and then find out the grocery store doesn’t have one of the ingredients you so desperately needed for that new recipe!  This happens to me fairly often actually.  Living in Portland, OR I could likely find whatever ingredient I needed by going to one of the many choices I have for markets around here.  However, as a busy mom, that is not always practical, so like most of the world I just make do and find a substitute if I can.

Tonight’s recipe called for red chili peppers.  I’ve seen them, and even bought them before, but apparently it wasn’t at my main store.  In the past I have just substituted serranos or even jalapenos, but I just felt like it wasn’t enough for some reason.  Maybe I just wanted more color… forgetting that it would be blended up anyway.  Anyway, for some reason unbeknownst to me I grabbed some habaneros….. if you know much about peppers you know they are HOT.  I apparently wasn’t think about that, and was surprised to find out they are more like doubling up on your jalapenos.  OOPS.  Too late, I decided to just go with them, and use less than the recipe called for.  Like a good chef I tested a piece before I put it in there…. yep, definitely hot lol.  It worked out though, as the rest of the ingredients in the sauce mellowed it out nicely and it really wasn’t hot at all.  My husband would have liked it hotter, but I like it where you can taste the heat at certain points but not be overwhelmed by it so it was great for me.

The dish in it’s entirety was AWESOME!  Great Thai flavors for sure, and a nice combination of textures with the bit of crunch from the peanuts and carrots.  Everything comes together very quickly, and even more so if, like me, you opt to use rotisserie chicken.  Why not take a shortcut when you can?!  I did taste my sauce after first mixing it and decided to add a bit more of the more acidic ingredients (vinegar and lime juice) because it was almost too peanut buttery still.  I also threw in some lime zest…. no sense in wasting it!  I used about 1.5 T of the sriracha.

Having a child with peanut allergies (obviously  he doesn’t eat things like this lol), means extra work.  I am not a minimalist cook, and use a lot of dishes/surfaces to create my masterpieces.  Especially if I am blogging the dish and want it to look as good as it tastes as there are sometimes extra steps to ensure that.  This means peanuts of some form likely touch MANY surfaces in my kitchen before I am done.  That means EXTRA cleaning up after it’s all done, and definitely not being able to take the lazy approach and swear to myself I will get it later.  But a great Thai dish with a peanut sauce is ALWAYS worth it for me!  Such a fantastic blend of flavors!  If you have never tried it, I suggest you dive right in and make this dish ASAP!

_MG_0818-1 copy _MG_0836-2 copy

Thai Quesadillas With Grilled Chicken

Ingredients :

  • 1 boneless, skinless chicken breast (I used about 8oz shredded rotisserie chicken)
  • 2 carrots, cut into matchsticks
  • 1/2 onion, sliced
  • 2 T. cilantro, chopped
  • 2 T. peanuts, crushed
  • 4 oz. Monterey Jack cheese, shredded (I used about like 6 oz)
  • 4 (10″) flour tortillas
  • 1/3 cup + peanut sauce (below)
  • salt and pepper to taste
  • cooking spray
  • cilantro for garnish

Sauce Ingredients :

  • 1/4 cup creamy peanut butter
  • 1/2 tsp. garlic, minced
  • 1/2 tsp. red chili peppers, minced
  • 1/4 tsp. fish sauce
  • 1 T. honey
  • 1 T. soy sauce
  • 1 T. vinegar (I used rice vinegar)
  • 1/2 T. olive oil
  • juice of 1/2 lime (throw in zest too optional)
  • 2 T. water
  • 1-2 T. sriracha

Directions :

  1. To make chicken, preheat an indoor grill over medium-high heat. Season the chicken breast with salt and pepper and place on the hot grill. Grill each side until cooked through and the juices run clear, about 4 minutes per side. Once cooked, remove the chicken from the grill and allow it to rest.
  2. While the chicken is resting, prepare the peanut sauce. Add all of the ingredients to a blender and pulse until smooth. Add additional Sriracha for a spicier sauce. Set aside.
  3. Heat a skillet over medium-high heat. Spray with a little cooking spray and add the onions. Cook until the onions start to soften, then add the carrots.  Add salt and pepper to taste.  Cook for an additional minute, then remove from heat. Set aside.
  4. Cut the chicken into strips against the grain. Toss the strips with about ¼ to ⅓ cup of peanut sauce. Reserve the remaining sauce for drizzling.
  5. Assemble the quesadillas by topping a tortilla with half of the chicken in peanut sauce, onions, carrots, cilantro, and cheese. Top with a second tortilla. Place the tortilla on a skillet or griddle over medium-high heat. Once the quesadilla is golden on the first side, carefully flip the quesadilla over. Cook until the cheese has completely melted and the second side is golden brown. Repeat with remaining tortillas and fillings.  * a tip for flipping it is to slide it out of the skillet onto a flat surface so you can better get a spatula and hand under it without burning yourself.  This way you can also respray your skillet to ensure better browning on the second side, then just flip it carefully in.
  6. Top the quesadillas with cilantro, crushed peanuts, and a drizzle of the remaining peanut sauce. Serve immediately.

Recipe from That Oven Feelin’

Tex-Mex Taco Pasta


If you’re like most people you probably find a recipe you like and then make it over and over until you eventually know it like the back of your hand.  There’s nothing wrong with that!  As some would say, why fix it if it’s not broken?!  I, however, look at things a little differently and rarely do I make the same recipe twice unless it was just so amazing that there is no question in my mind of whether a different version could ever top it… and even then I still might try.  Because of this, I have found that though a recipe can essentially have the same ingredients and even be prepared similarly, it only takes a small change to sometimes make a more substantial difference in flavor.  This allows me to not only find “better” (or sometimes worse) versions of a dish, but I guess i get to enjoy many good versions of a good dish without it ever seeming too familiar or boring.

This dish is one of those dishes.  I have made plenty of taco inspired pastas or casseroles, and they use basically the same things, but each is a little different from the other.  Some are more punchy or spicy in flavor, some more cheesy and indulgent, textures vary, etc.  I would consider this version a family friendly version which we really enjoyed, with all the great flavors you would expect but somehow in a mild form if that makes sense.  This one is also quite simple to prepare, which I guess most are, but this one especially so, making it a perfect weeknight meal.  There was enough for us to have this two nights which is always a bonus during a busy week!  Even my picky child…. ok BEYOND picky…  said he didn’t totally hate this.  Which actually means he kind of liked it and just won’t admit it and eat new foods.

My only issues with the recipe were minor things.  The first being the rotel tomatoes… it called for 15 oz, and I could only find 10 oz cans.  No biggie, I just went with 2 and I think that worked out perfectly.  The second issue was during the step where it says to season the browned meat with the taco seasoning.  I have seen recipes that go both ways, and this one did NOT state whether I should use the water as directed on the packet.  However, it did say to simmer, which I imagine couldn’t happen very well without the water so I decided to go with it and I am glad I did.  Whether or not it was intended it worked out great that way and I would suggest for sure using it as directed on the packet.  The last small thing was that the recipe said to add the beans, corn, and rotel at the end of simmering the meat and turn off heat.  I wanted to be sure everything was heated through so I just left the burner on medium-low and kept it stirred until my pasta was done.

I used an organic 85/15 beef, and a taco blend of Mexican cheeses.  I also opted for the original rotel tomatoes, which I am sure has a lot to do with my mild flavors, but if your family is all ok with some heat feel free to use a spicier version. Of course I could add various things to this to make it better, or different at least to better suite our tastes…. but that would be a new recipe… and perhaps one I will come across later on!

_MG_0810-1 copy

Tex-Mex Taco Pasta

Ingredients :

  • 1 lb ground beef
  • 1 packet low sodium taco seasoning (plus water suggested on packet)
  • 12 oz. farfalle (bow tie) pasta
  • 15 oz rotel tomatoes (or 20 oz in my case), drained of excess liquid
  • 15 oz can sweet corn, drained
  • 15 oz. can black beans (low sodium), rinsed and drained
  • 2 cups Mexican blend cheese
  • 1/4 cup heavy cream
  • cilantro

Directions :

  1. Cook farfalle according to package directions in salted water.
  2. Meanwhile brown your beef in a high-rimmed skillet over medium-high heat.  Drain the excess grease off.  Add taco seasoning (and water) and allow to simmer for 5 minutes.
  3. Add rotel tomatoes, corn, and black beans.  Reduce heat to a medium-low or low and stir occasionally to keep things heated through until the pasta is done.
  4. Drain pasta, and put back into pot.  Add the meat mixture, cheese, and heavy cream.  Stir until cheese has melted in. 
  5. Serve with chopped cilantro to garnish.

Recipe from catz in the kitchen

Published in: on January 9, 2015 at 8:24 pm  Leave a Comment  
Tags: , , , , , , , ,